- Docker - Home
- Docker - Overview
- Docker - Installing on Linux
- Docker - Installation
- Docker - Hub
- Docker - Images
- Docker - Containers
- Docker - Registries
- Docker - Compose
- Docker - Working With Containers
- Docker - Architecture
- Docker - Layers
- Docker - Container & Hosts
- Docker - Configuration
- Docker - Containers & Shells
- Docker - Dockerfile
- Docker - Building Files
- Docker - Public Repositories
- Docker - Managing Ports
- Docker - Web Server
- Docker - Commands
- Docker - Container Linking
- Docker - Data Storage
- Docker - Volumes
- Docker - Networking
- Docker - Security
- Docker - Toolbox
- Docker - Cloud
- Docker - Build Cloud
- Docker - Logging
- Docker - Continuous Integration
- Docker - Kubernetes Architecture
- Docker - Working of Kubernetes
- Docker - Generative AI
- Docker - Hosting
- Docker - Best Practices
- Docker - Setting Node.js
- Docker - Setting MongoDB
- Docker - Setting NGINX
- Docker - Setting ASP.Net
- Docker - Setting MySQL
- Docker - Setting Go
- Docker - Setting Rust
- Docker - Setting Apache
- Docker - Setting MariaDB
- Docker - Setting Jupyter
- Docker - Setting Portainer
- Docker - Setting Rstudio
- Docker - Setting Plex
- Docker Setting - Flame
- Docker Setting - PostgreSql
- Docker Setting - Mosquitto
- Docker Setting - Grafana
- Docker Setting - Nextcloud
- Docker Setting - Pawns
- Docker Setting - Ubuntu
- Docker Setting - RabbitMQ
- Docker - Setting Python
- Docker - Setting Java
- Docker - Setting Redis
- Docker - Setting Alpine
- Docker - Setting BusyBox
- Docker Setting - Traefik
- Docker Setting - WordPress
- Docker Useful Resources
- Docker - Quick Guide
- Docker - Useful Resources
- Docker - Discussion
Docker Building Files
A Dockerfile is essentially a set of instructions, written in simple text format, upon which Docker bases the building process of Docker images. For example, it has the base image that one must start with, instructions for installation of software, libraries, dependencies, copying files, and running commands necessary in an application environment.
Think of it as a recipe for your container about listing ingredients and cooking steps to execute, and it ends up producing a ready-to-run Docker image, quite like a delicious dish.
Read this chapter to learn Dockerfiles and how to build them to create and run Docker Images.
Dockerfile Instructions
Dockerfile instructions are a set of commands used in the building process of a Docker image. Every instruction added to the Dockerfile outlines an environment and behavior for a container that will run the application eventually.
Listed here are 10 essential Dockerfile instructions along with examples, showing how to use them −
| Instruction | Description |
|---|---|
| FROM | Specifying the base image you're building from |
| RUN | Run a command on a new layer of the current image and commit |
| COPY | Copy files or directories from the host filesystem into the image filesystem |
| WORKDIR | Set the working directory for any subsequent instructions. |
| ENV | It sets the environment variables |
| EXPOSE | Inform Docker that the container has interests in specific network ports at runtime |
| CMD | Provides the default command and/or parameters for the Container |
| ENTRYPOINT | This configures a container to run as an executable |
| VOLUME | Creates a mount point with the specified path and marks it as holding externally mounted volumes |
| USER | Sets the username or UID to use when running the image |
Example
Let's create a Dockerfile for a simple Node.js application −
# Use the official Node.js image as a base
FROM node:14

# Set the working directory
WORKDIR /app

# Copy package.json and package-lock.json to the working directory
COPY package*.json ./

# Install dependencies
RUN npm install

# Copy the rest of the application code
COPY . .

# Expose port 3000 to the outside world
EXPOSE 3000

# Set environment variables
ENV NODE_ENV=production

# Default command to run when the container starts
CMD ["node", "index.js"]
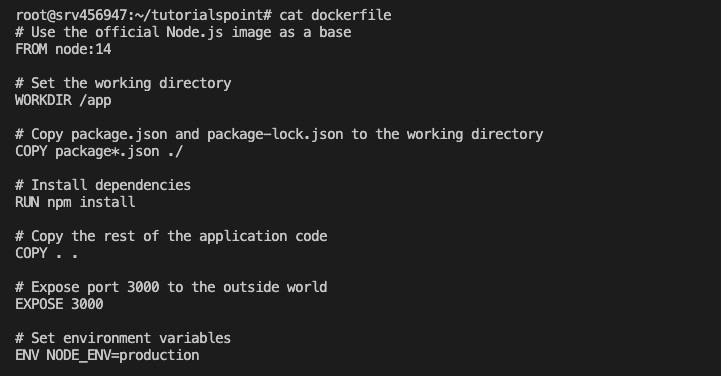
This very Dockerfile builds an image for a Node.js application, sets up the environment, installs dependencies, exposes a port, and defines how it should start an application.
How to Build an Image from Dockerfile?
You can build Docker images from a Dockerfile using some of the important Docker commands through Docker's Command-Line Interface or CLI.
Lets check a step-by-step guide to building, tagging, and running an image using essential Docker commands based on the above example Dockerfile.
Build Docker Image
To build a Docker image from a Dockerfile, use the docker build command −
$ docker build -t my-node-app:v1 .
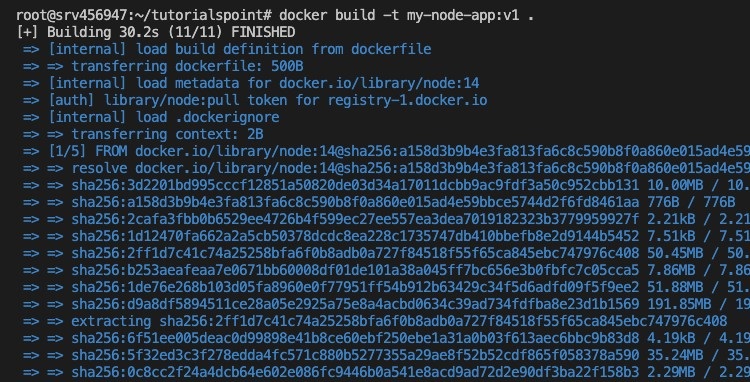
- -t my-node-app:v1 − The image to be built will have the name "my-node-app" with the tag "v1".
- . (dot) − Specifies the build context, which is the current directory containing the Dockerfile.
List Docker Images
This command will list all of the Docker images currently on your system.
$ docker images
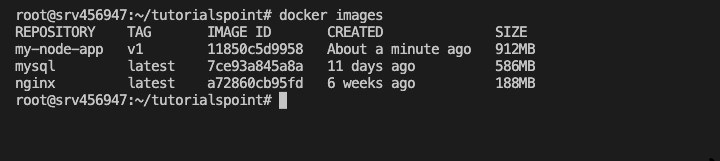
This will display a list of all images along with their tags, sizes, and creation dates.
Tagging an Image
You can use the docker tag command to tag an existing image to another tag or repository name.
$ docker tag my-node-app:v1 my-registry/my-node-app:v1
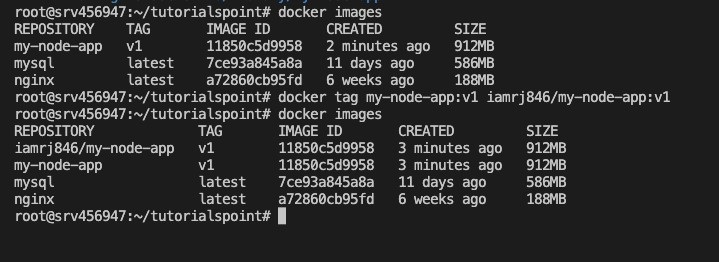
- my-node-app:v1 − The image name and the current tag.
- my-registry/my-node-app:v1 − Name for the new repository and tag.
Run a Docker Container
To run a container based on a specific image, use the docker run command −
$ docker run -p 3000:3000 my-node-app:v1
- -p 3000:3000 − This would map the port 3000 of the host to the port 3000 inside the container (Port binding).
- my-node-app:v1 − This would be the name of the image you will run and the tag for that particular image.
List the Running Containers
To see which containers are currently running, you can use the docker ps command −
$ docker ps
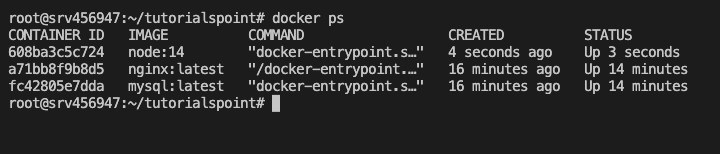
This will return the list of running containers along with their IDs, status, ports, and names.
Stop a Running Container
To stop a running container, use the docker stop command followed by the container ID or name −
$ docker stop <container-id or container-name>
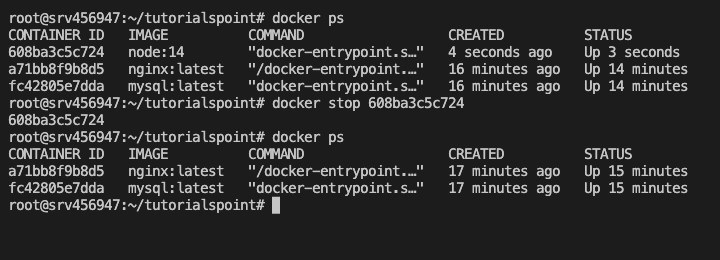
You can replace "<container-id or container-name>" with the actual ID or name of the container you want to stop.
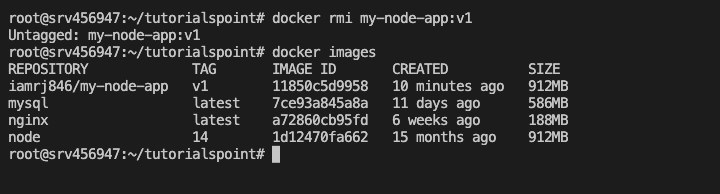
Removing an Image
To remove an image from your system, you can use the docker rmi command. This takes either an image ID or tag as an argument.
$ docker rmi my-node-app:v1
What is a .dockerignore File?
The .dockerignore file does the same thing as .gitignore, defining patterns of files and directories that should be ignored for the Docker build context.
As Docker builds an image, it sends the whole context directory - specified with the Docker build command to the Docker daemon. That means, excluding unneeded files and directories using ".dockerignore" can speed up the build and reduce the size of the final image.
Syntax and Usage
- Create a ".dockerignore" file located in the root directory of your Docker build context.
- List files and directories (one per line) that you want Docker to ignore in the build process.
Example .dockerignore File
The following is an example ".dockerignore" file for a Node.js application −
node_modules
npm-debug.log
Dockerfile
.dockerignore
.git
Explanation
- node_modules − Since you want to use npm install as part of your build, this excludes the node_module directory from copying all unwanted dependencies into the Docker image.
- npm-debug.log − Ignores npm debug logs, which are unnecessary in the Docker image.
- Dockerfile − This prevents the actual Dockerfile itself from being copied into the Docker image.
- .dockerignore − It helps to prevent the .dockerignore file itself from being included in the build context.
- .git − Excludes the .git directory to avoid copying unnecessary Git repository information.
Best Practices
- Include Specific Files − Include only those files and directories in your container that are needed to build and run your application within Docker.
- Using Wildcards − Asterisk (*) and double asterisk (**) can be used in wildcard patterns that match files and directories.
- Keep it Minimal − The ".dockerignore" itself should be as minimal as possible to prevent the removal of files unintentionally.
Difference between COPY and ADD instructions in a Dockerfile
Both COPY and ADD are used for copying files from your host machine into the Docker image. However, in most cases, COPY is a preferable choice; it's much more transparent. If you need to copy only files from source to destination in the image, you should use COPY instruction.
ADD has additional features, such as the automatic extraction of compressed files and the ability to fetch files from remote URLs but it adds potential unexpected behavior and possible security risks. If you need none of those features, COPY is the preferred instruction for better clarity and maintainability of your Docker files.
Conclusion
In this chapter, we have discussed the intricacies of Dockerfiles, why they are used, and the several important Dockerfile instructions needed to build a Docker image.
Then we understood an example of a Dockerfile to create a NodeJs Docker Image and the different commands that can be used to build and tag images, run containers, list images and containers, etc.
Finally, we discussed why it is necessary to use a Dockerignore file in the build context. You are now well-equipped to create and build an image from a Dockerfile.