- Docker - Home
- Docker - Overview
- Docker - Installing on Linux
- Docker - Installation
- Docker - Hub
- Docker - Images
- Docker - Containers
- Docker - Registries
- Docker - Compose
- Docker - Working With Containers
- Docker - Architecture
- Docker - Layers
- Docker - Container & Hosts
- Docker - Configuration
- Docker - Containers & Shells
- Docker - Dockerfile
- Docker - Building Files
- Docker - Public Repositories
- Docker - Managing Ports
- Docker - Web Server
- Docker - Commands
- Docker - Container Linking
- Docker - Data Storage
- Docker - Volumes
- Docker - Networking
- Docker - Security
- Docker - Toolbox
- Docker - Cloud
- Docker - Build Cloud
- Docker - Logging
- Docker - Continuous Integration
- Docker - Kubernetes Architecture
- Docker - Working of Kubernetes
- Docker - Generative AI
- Docker - Hosting
- Docker - Best Practices
- Docker - Setting Node.js
- Docker - Setting MongoDB
- Docker - Setting NGINX
- Docker - Setting ASP.Net
- Docker - Setting MySQL
- Docker - Setting Go
- Docker - Setting Rust
- Docker - Setting Apache
- Docker - Setting MariaDB
- Docker - Setting Jupyter
- Docker - Setting Portainer
- Docker - Setting Rstudio
- Docker - Setting Plex
- Docker Setting - Flame
- Docker Setting - PostgreSql
- Docker Setting - Mosquitto
- Docker Setting - Grafana
- Docker Setting - Nextcloud
- Docker Setting - Pawns
- Docker Setting - Ubuntu
- Docker Setting - RabbitMQ
- Docker - Setting Python
- Docker - Setting Java
- Docker - Setting Redis
- Docker - Setting Alpine
- Docker - Setting BusyBox
- Docker Setting - Traefik
- Docker Setting - WordPress
- Docker Useful Resources
- Docker - Quick Guide
- Docker - Useful Resources
- Docker - Discussion
Docker Setting ASP.Net
ASP.NET is a free, open-source web application framework developed by Microsoft, which helps in building robust, scalable web applications with languages like C#, F#, etc. The traditional way of deploying ASP.NET applications sometimes becomes cumbersome due to several configurations on the target environment aimed at making sure all dependencies are properly ground.
This is where Docker comes in. Docker is a containerization platform that packages an application and all its dependencies into one lightweight, portable unit called a container.
In this chapter, let's discuss how to Dockerize an ASP.NET application. We will start with understanding the prerequisites for doing so.
Prerequisites for Dockerizing ASP.NET
To begin with, you should ensure that you have the following tools and knowledge −
- .NET SDK 8 or Later − The latest .NET SDK can be downloaded from this link: Download .NET For Windows.
- Docker Desktop − User-friendly interface for manipulating containers. You can download and install Docker Desktop depending on your operating system from: Docker Desktop
- Text Editor or IDE − You will need a text editor or an IDE, for example, Visual Studio Code or a dedicated .NET Integrated Development Environment to create and edit your ASP.NET project.
- Git Client (Optional) − If you also want to use Git for source control on your project, then install a Git client such as Git Bash.
Setting up an ASP.NET Core Project
You can set up an ASP.NET Core project in two main ways −
- Using an IDE − Most of the IDEs for .NET like Visual Studio and Visual Studio Code provide a built-in functionality to create ASP.NET Core projects. You can simply click on the "Create New Project" option within your IDE, then choose "ASP.NET Core Web App" as the project template, and customize your project name and location.
- Using the .NET CLI − You can also use the terminal or command prompt. Navigate to the desired directory for your project. Then, run the following command, replacing <ProjectName> with your desired name −
$ dotnet new webapp -n <ProjectName>

Project Structure and Dependencies
Next, you can initialize docker for your project using the below command.
$ docker init
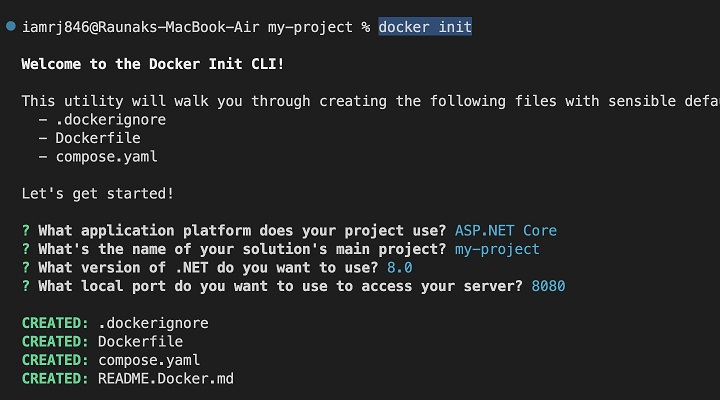
Once you run the above commands, your ASP.NET Core project structure should look like this −
my-project/

 Dockerfile

 .dockerignore

 docker-compose.yml  (optional)

 my-project.csproj

 Properties

    launchSettings.json

 Program.cs

 appsettings.Development.json

 appsettings.json

 obj/  (Intermediate compilation output)

 Pages/  (Razor Pages)

 wwwroot/  (Static files)

    css

    images

    js

    lib

 ... (other project-specific folders)
Explanation of directories
- Dockerfile − Defines the build instructions for the Docker image.
- .dockerignore − Specifies files and directories to exclude from the Docker image.
- docker-compose.yml − (Optional) Defines and runs multi-container Docker applications.
- my-project.csproj − The project file containing project metadata and dependencies.
- Properties − Contains configuration files, such as launch settings.
- Program.cs − The application's entry point.
- appsettings.json − Configuration settings for the application.
- obj − Contains intermediate compilation output, usually ignored in version control.
- Pages − Contains Razor Pages for your application.
- wwwroot − Contains static files like CSS, JavaScript, and images.
Note − The ... placeholder represents other custom-created folders such as Controllers, Models, Views, Data, Tests, etc., that you may create depending on your project's requirements.
Running the ASP.NET Project Locally
To run the Project locally −
- Navigate to Project Directory − Fire up your terminal or command prompt and navigate to the root directory of your ASP.NET Core project.
- Build the Project − Then run the below command to build your project −
$ dotnet build

The dotnet build command will compile the project's code and create the necessary output files.
If the build is successful, you can execute the following command to run your application −
$ dotnet run
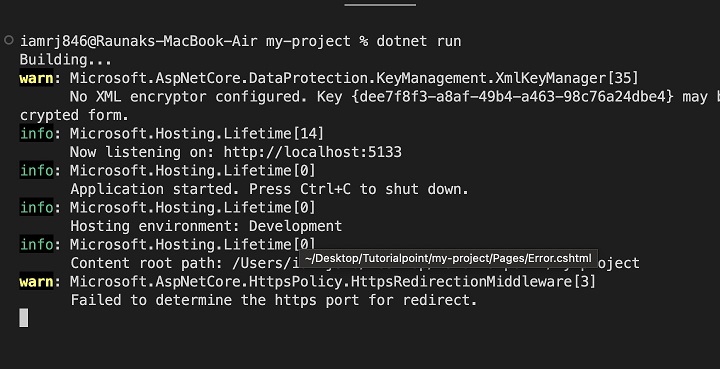
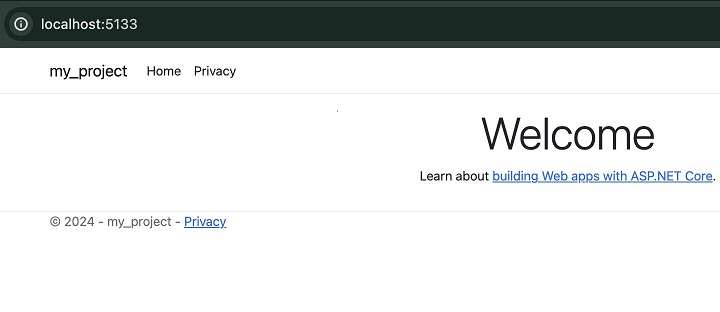
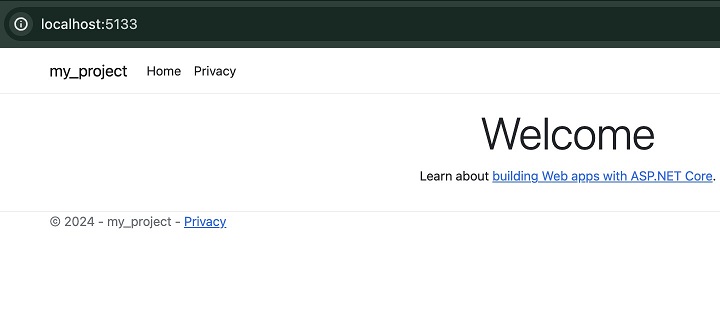
This will start the ASP.NET application. You can launch a web browser window by clicking on the default development URL (often http://localhost:5133).
Once you have verified your ASP.NET Core project running locally, you can proceed to the next step of creating the Dockerfile to Dockerize it.
Creating the Dockerfile
Using a Dockerfile, you will be able to define the instructions to build the ASP.NET Docker image for our application.
Basic Dockerfile Structure
Here's a basic Dockerfile for an ASP.NET Core application. You can copy this code to the Dockerfile in your projects root directory.
# Use the official ASP.NET Core SDK image as the base

FROM mcr.microsoft.com/dotnet/sdk:8.0-alpine AS build

# Set the working directory in the container

WORKDIR /app

# Copy csproj and restore assets

COPY *.csproj ./

RUN dotnet restore

# Copy everything else and build

COPY . .

RUN dotnet publish -c Release -o /app/publish

# Use the official ASP.NET Core runtime image as the base

FROM mcr.microsoft.com/dotnet/aspnet:8.0-alpine

# Copy the published output from the build stage

WORKDIR /app

COPY --from=build /app/publish .

# Expose port 80

EXPOSE 80

# Set the command to run the application

ENTRYPOINT ["dotnet", "my-app.dll"]
Explanation of the Dockerfile
- FROM mcr.microsoft.com/dotnet/sdk:8.0-alpine AS build − Using this instruction, you can specify the base image for the build. We will use the .NET SDK image with Alpine Linux since it has a smaller image size. The AS build part of the instruction gives this stage a name.
- WORKDIR /app − This will set the working directory inside the container.
- COPY *.csproj ./ − This instruction copies the project files to the working directory.
- RUN dotnet restore − It restores the project's dependencies.
- COPY . . − Copies the entire project to the container.
- RUN dotnet publish -c Release -o /app/publish − This will publish the application in release mode to the /app/publish directory.
- FROM mcr.microsoft.com/dotnet/aspnet:8.0-alpine − This instruction will specify the base image for the runtime stage. We will be using the .NET runtime image with Alpine Linux.
- COPY --from=build /app/publish . − Copies the published output from the build stage to the current stage.
- WORKDIR /app − Sets the working directory inside the container.
- EXPOSE 80 − Exposes port 80 for HTTP traffic.
- ENTRYPOINT ["dotnet", "my-app.dll"] − Specifies the command to run when the container starts. You may replace my-app.dll with the actual name of your application's assembly.
Next, lets see how to build the ASP.NET Docker image.
Building the ASP.NET Docker Image
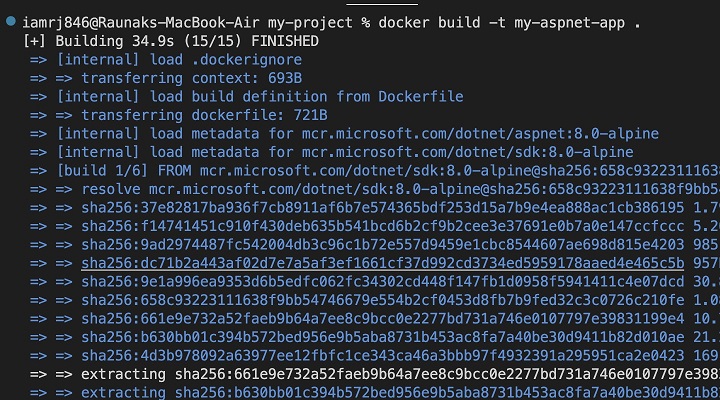
Now that you have the Dockerfile defined in your project directory, you can use the below docker build command to build a Docker image.
$ docker build -t my-aspnet-app .
- docker build − This is the command to build a Docker image.
- -t my-aspnet-app − This flag can be used to specify a tag for the image. You can replace my-aspnet-app with your desired image name and tag (e.g., my-app:v1).
- . − This refers to the current directory where the Dockerfile is located.
To verify the successful build, you can use the docker images command to list all available Docker images on your system.
$ docker images

Next, lets try to run a Docker container associated with this ASP.NET Docker image.
Running the ASP.NET Docker Container
Now that you have a Docker image built, lets run it as a container. Fire up your terminal and run the following command to start the container.
$ docker run -d -p 5133:5133 my-aspnet-app
- docker run − This command starts a new container from an existing image.
- -d − This flag runs the container in detached mode, which means that it runs in the background without attaching a terminal.
- -p 8000:80 − This flag maps port 80 inside the container (where your ASP.NET app typically listens) to port 8000 on your host machine. This allows you to access the application through your browser.
- my-aspnet-app − Replace this with the actual name and tag of your Docker image created in the previous step.
You can use the below command to see the running containers in your host machine.
$ docker container ls
If you see your container running, you can visit http://localhost:5133 on your browser.
Conclusion
You have now successfully containerized your ASP.NET Core application using Docker with these steps. You've learned how to create a Dockerfile, build an image, and run your application from that as a container. That provides consistency, isolation, and scalability for the app; thus, it will be easier to deploy and manage across different environments.
FAQs on Setting ASP.NET in Docker
1. How do I create a Docker image for my ASP.NET application?
To do this, you need a Dockerfile to Dockerize your ASP.NET app. The Dockerfile defines a Microsoft dotnet base image, then it has commands for Docker to copy all files and their dependencies necessary for the app, and finally, it also has the commands that the app runs under, such as dotnet run. Build the image using docker build and then run it with docker run, exposing the port that your ASP.NET application is listening on.
2. How do I manage configuration settings in a Dockerized ASP.NET application?
You can control configuration settings in your ASP.NET application by using environment variables. Set them in your Dockerfile by using the ENV argument or pass them at run time using the -e option to docker run. Access these variables inside your ASP.NET code by using configuration providers like IConfiguration.
3. How can I integrate a Dockerized ASP.NET application with a database?
To hook up your ASP.NET application to a database, run the database in a separate container - for instance, MySQL or SQL Server - with the proper drivers for the database used inside your application.
Ensure there is enough network connectivity between containers. Configure connection strings in your ASP.NET application code for connecting to the database. Consider using a container orchestration platform, such as Kubernetes, to help manage multiple containers for your application and database.