- Docker - Home
- Docker - Overview
- Docker - Installing on Linux
- Docker - Installation
- Docker - Hub
- Docker - Images
- Docker - Containers
- Docker - Registries
- Docker - Compose
- Docker - Working With Containers
- Docker - Architecture
- Docker - Layers
- Docker - Container & Hosts
- Docker - Configuration
- Docker - Containers & Shells
- Docker - Dockerfile
- Docker - Building Files
- Docker - Public Repositories
- Docker - Managing Ports
- Docker - Web Server
- Docker - Commands
- Docker - Container Linking
- Docker - Data Storage
- Docker - Volumes
- Docker - Networking
- Docker - Security
- Docker - Toolbox
- Docker - Cloud
- Docker - Build Cloud
- Docker - Logging
- Docker - Continuous Integration
- Docker - Kubernetes Architecture
- Docker - Working of Kubernetes
- Docker - Generative AI
- Docker - Hosting
- Docker - Best Practices
- Docker - Setting Node.js
- Docker - Setting MongoDB
- Docker - Setting NGINX
- Docker - Setting ASP.Net
- Docker - Setting MySQL
- Docker - Setting Go
- Docker - Setting Rust
- Docker - Setting Apache
- Docker - Setting MariaDB
- Docker - Setting Jupyter
- Docker - Setting Portainer
- Docker - Setting Rstudio
- Docker - Setting Plex
- Docker Setting - Flame
- Docker Setting - PostgreSql
- Docker Setting - Mosquitto
- Docker Setting - Grafana
- Docker Setting - Nextcloud
- Docker Setting - Pawns
- Docker Setting - Ubuntu
- Docker Setting - RabbitMQ
- Docker - Setting Python
- Docker - Setting Java
- Docker - Setting Redis
- Docker - Setting Alpine
- Docker - Setting BusyBox
- Docker Setting - Traefik
- Docker Setting - WordPress
- Docker Useful Resources
- Docker - Quick Guide
- Docker - Useful Resources
- Docker - Discussion
Docker - Setting Jupyter
Jupyter Notebook is an open-source web application that makes it possible to create documents that contain live code, equations, visualizations, and narrative text, all in one single place.
Jupyter Notebook can also be very useful for data science, machine learning, and scientific computing due to its easy and interactive way of coding. However, managing Jupyter environments and their dependencies is a challenge; this is normally an issue when collaborating or deploying projects.
Docker comes to help by containerizing the Jupyter Notebooks; this way, the environment would be reusable, dependency management would get easier, and the notebooks would become portable. Running Jupyter in Docker means you can wrap the environment up completely for easier distribution, replication, and scaling of your setup of Jupyter with ease.
Prerequisites to Dockerize Jupyter Notebook
Before we commence the Dockerization process of Jupyter, ensure that you have the following prerequisites −
- Docker Installed − You need to have Docker installed on your machine. If Docker is not yet installed, you can download it from Docker's official website.
- Basic Docker Knowledge − It will be helpful to have some knowledge regarding at least the basic concepts of Docker, such as Images, Containers, and basic Docker commands.
- Jupyter Notebook Installed − This will be beneficial to understand the comparison of running it in Docker.
- Code Editor − Any code editor. For example, VSCode, Atom, or any other editor of your choice that you will use to create and edit the configuration files.
- Access to CLI − Basic usage of the command line or terminal; you will be running commands to install Docker and manage your Jupyter container.
These prerequisites meet the requirement for smooth follow-through of this chapter on Dockerizing Jupyter.
Setting up a Jupyter Project
Lets set up a basic Jupyter project. We can create a project directory with all the necessary files, including configuration files and scripts.
Create a Project Directory
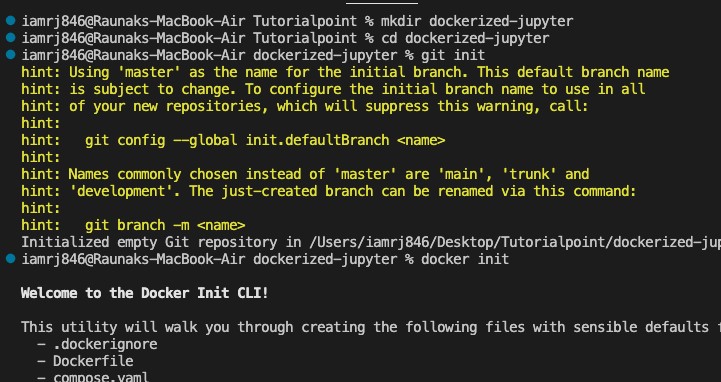
Use the following commands to create a project directory −
$ mkdir dockerized-jupyter
$ cd dockerized-jupyter
Initialize the Project
Initialize a version control system like Git to help you keep track of changes to your project. Also, you can initialize Docker −
$ git init
$ docker init
Create a Jupyter Notebook File
Create a sample Jupyter Notebook file that youll use to test your setup.
$ touch sample_notebook.ipynb
Project Structure and Dependencies
Now that we have a project directory, including the structure of the outline and dependencies our Jupyter setup will need, keeping this project structure will pay off-especially as projects grow larger.
Project Structure
Your project directory should look something like this −
dockerized-jupyter/


 Dockerfile               # Dockerfile to build the Jupyter image

 requirements.txt         # Python dependencies

 sample_notebook.ipynb    # Sample Jupyter notebook

 README.md                # Optional: Documentation for the project
Dependencies
The core dependencies for this project will be essentially a Jupyter Notebook, plus additional Python libraries you may want to use inside your notebooks. To handle such dependencies, you will use a "requirements.txt" file that lists all the Python packages that must be installed into the Docker container.
Create the requirements.txt File
This should list Jupyter, along with any other Python packages you want to include in your work with notebooks.
Example content of requirements.txt −
jupyter
numpy
pandas
matplotlib
Configuration of Dockerfile
Your Dockerfile will have this requirements.txt for installing the necessary packages when creating the Docker image. We will see the details of the Dockerfile in the next section.
With the structure of the project defined and dependencies set up, you can now proceed to run Jupyter locally and set up the Dockerfile for containerizing your environment.
Running Jupyter in Local
Lets run the Jupyter app locally before Dockerizing to see it up and correct. You would understand the setup better and be in a good position to ensure that your Jupyter environment works as it should before you could finally containerize it.
Step 1: Setting up Jupyter Locally
If you do not have Jupyter Notebook installed on your local machine, you can easily install it using pip. Be in your project directory and then execute the following −
pip3 install jupyter
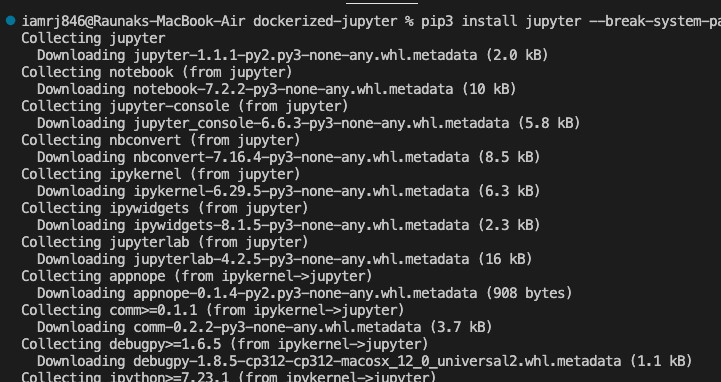
This will install Jupyter Notebook along with its dependencies.
Step 2: Execute Jupyter Notebook
Once installed, you can start the Jupyter Notebook server by running −
$ jupyter notebook

This will start the Jupyter server and then open the Jupyter Notebook interface in your default web browser. By default, it will list all the files in your current directory, including the sample_notebook.ipynb you created above.
Step 3: Open and Edit the Notebook
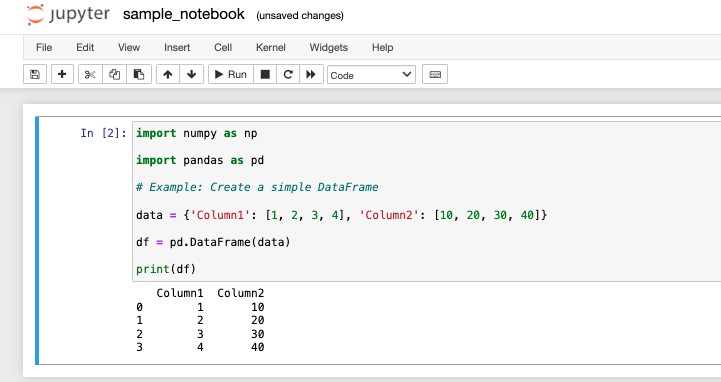
Open the sample_notebook.ipynb file by clicking on it in the Jupyter interface; you can add some simple Python code or notes to this notebook to test your setup. An example Python script that imports some common libraries, including numpy and pandas, and performs a basic calculation −
import numpy as np

import pandas as pd

# Example: Create a simple DataFrame

data = {'Column1': [1, 2, 3, 4], 'Column2': [10, 20, 30, 40]}

df = pd.DataFrame(data)

print(df)
Run the code cells to make sure everything runs correctly.
Step 4: Verify the Environment
Ensure that −
- The Jupyter Notebook server starts without any errors.
- You can open and edit notebooks without issues.
- The necessary Python packages (e.g., numpy, pandas, matplotlib) are working correctly.
Creating the Dockerfile
Here's the Dockerfile to containerize Jupyter −
# Use the official Python image from Docker Hub
FROM python:3.9-slim

# Set the working directory
WORKDIR /app

# Copy requirements.txt into the working directory
COPY requirements.txt .

# Install Python dependencies
RUN pip install --no-cache-dir -r requirements.txt

# Expose the default Jupyter port
EXPOSE 8888

# Start Jupyter Notebook
CMD ["jupyter", "notebook", "--ip=0.0.0.0", "--port=8888", "--no-browser", "--allow-root"]
Steps Explained
- Base Image − Uses python:3.9-slim for a lightweight Python environment.
- Working Directory − Sets /app as the working directory inside the container.
- Copy Dependencies − Copies requirements.txt to the container.
- Install Dependencies − Installs Jupyter and other Python packages listed in requirements.txt.
- Expose Port − Opens port 8888 for accessing Jupyter Notebook.
- Command − Runs Jupyter Notebook with settings to allow access from any IP, on port 8888, and permits root access.
Building the Jupyter Image
Lets build the Docker image for our Jupyter setup. This image will package everything needed to run Jupyter Notebook, making it easy to deploy and share.
Steps to Build the Image
1. Open Terminal − Go to your project directory where the Dockerfile is located.
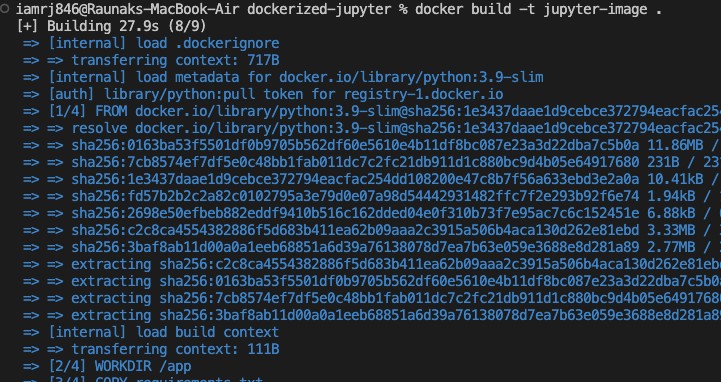
2. Build the Docker Image − Run the following command to build your Docker image. Replace jupyter-image with your desired image name.
$ docker build -t jupyter-image .
-t jupyter-image − Tags the image with the name jupyter-image.
.: Specifies the current directory as the build context.
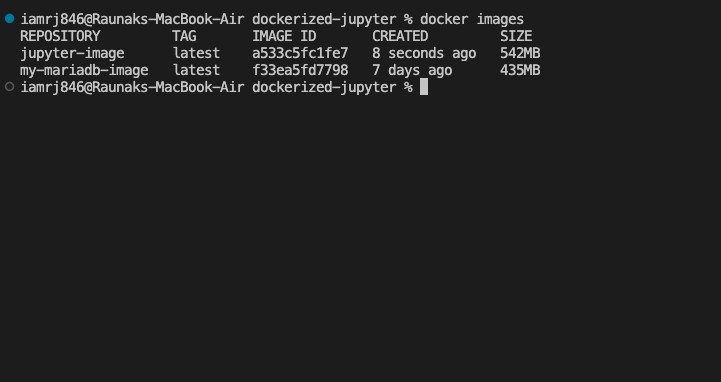
3. Verify the Image − After building, verify that your image is listed among Docker images −
$ docker images
Look for jupyter-image in the list to confirm it was built successfully.
Running the Jupyter Docker Container
With the Docker image in place, the next step is to run it as a container. This will start Jupyter Notebook inside a Docker container and make it accessible from your host machine.
To start the container containing Jupyter, run the following in your Terminal. To access Jupyter from your browser, it maps the container's port 8888 to port 8888 on your host.
$ docker run -p 8888:8888 jupyter-image

Once the container is up and running, you should see a URL starting like http://127.0.0.1:8888/tree?token=some_token in your terminal. You can open this URL in your web browser to open Jupyter Notebook.
Conclusion
In this chapter, we explained how to Dockerize Jupyter by setting up a project, defining its structure and dependencies, running Jupyter locally, and writing a Dockerfile that containerizes the environment.
We created a Docker image and run it as a container wherein Jupyter Notebook can be more easily accessed and consistent across different setups. This will not only ease the handling of dependencies but also keep your Jupyter environment portable and reproducible.
Further steps may involve tailored customization of your Docker setup with particular Jupyter extensions, running Jupyter in a multi-container setup using Docker Compose, or deploying your Dockerized Jupyter environment to cloud platforms for scalable data science workflows.
FAQs on Dockerizing Jupyter Notebook
There are some very Frequently Asked Questions(FAQ) about dockerizing jupyter notebook, this section tries to answer them briefly.
1. How do I connect to a Dockerized Jupyter Notebook?
To connect to a Dockerized Jupyter Notebook, you will have access to the interface of the Jupyter Notebook via a web browser using an IP address of the Docker host along with an exposed port as connection information. Depending on your environment, you may have to configure port forwarding or network settings.
2. How do I install additional Python packages in a Dockerized Jupyter Notebook?
To install other Python packages in the Docker container, you can use the pip command. You can put the package installation commands in a Dockerfile, or you can invoke them interactively inside the container. Just ensure the packages you create are compatible with the Python your base image uses.
3. How do I persist Jupyter Notebook data in a Docker container?
To persist data from Jupyter Notebook, you need to use a volume so that a directory on your host machine gets mapped to a directory inside the container. So whatever notebooks, data, or files you create from within the running instance of Jupyter Notebook will be persisted into the host volume and not lost once the container is stopped.