- Docker - Home
- Docker - Overview
- Docker - Installing on Linux
- Docker - Installation
- Docker - Hub
- Docker - Images
- Docker - Containers
- Docker - Registries
- Docker - Compose
- Docker - Working With Containers
- Docker - Architecture
- Docker - Layers
- Docker - Container & Hosts
- Docker - Configuration
- Docker - Containers & Shells
- Docker - Dockerfile
- Docker - Building Files
- Docker - Public Repositories
- Docker - Managing Ports
- Docker - Web Server
- Docker - Commands
- Docker - Container Linking
- Docker - Data Storage
- Docker - Volumes
- Docker - Networking
- Docker - Security
- Docker - Toolbox
- Docker - Cloud
- Docker - Build Cloud
- Docker - Logging
- Docker - Continuous Integration
- Docker - Kubernetes Architecture
- Docker - Working of Kubernetes
- Docker - Generative AI
- Docker - Hosting
- Docker - Best Practices
- Docker - Setting Node.js
- Docker - Setting MongoDB
- Docker - Setting NGINX
- Docker - Setting ASP.Net
- Docker - Setting MySQL
- Docker - Setting Go
- Docker - Setting Rust
- Docker - Setting Apache
- Docker - Setting MariaDB
- Docker - Setting Jupyter
- Docker - Setting Portainer
- Docker - Setting Rstudio
- Docker - Setting Plex
- Docker Setting - Flame
- Docker Setting - PostgreSql
- Docker Setting - Mosquitto
- Docker Setting - Grafana
- Docker Setting - Nextcloud
- Docker Setting - Pawns
- Docker Setting - Ubuntu
- Docker Setting - RabbitMQ
- Docker - Setting Python
- Docker - Setting Java
- Docker - Setting Redis
- Docker - Setting Alpine
- Docker - Setting BusyBox
- Docker Setting - Traefik
- Docker Setting - WordPress
- Docker Useful Resources
- Docker - Quick Guide
- Docker - Useful Resources
- Docker - Discussion
Docker - Setting Mosquitto
Mosquitto is a library to handle the internal communication between the server and the client using the MQTT protocol. It is an open-source and free message broker. It is used for developing applications related to real-time communication and IoT.
With the help of docker, Mosquitto can be containerized efficiently making it easy to manage, deploy, and scale in an isolated environment.
In this chapter, we will learn about the proper process of dockerizing the Mosquitto.
Prerequisites for Dockerizing Mosquitto
Before learning how to Dockerize Mosquitto, you need to have the following pre-requisites −
- Basics About the Docker Environment − Knowledge about Docker-related features for example: images, containers, dockerfiles, etc.
- Mosquitto Basics − Basic understanding of MQTT protocol and how Mosquitto provides the functionality of a message broker to the server and the client.
- Docker Installation − You need to have Docker installed in your system. In case you are facing any trouble regarding the installation of the docker, you can refer to this documentation: Docker's official website.
- Text Editor − You should be handy with a text editor in your system such as VSCode, Sublime, or simple Notepad before starting with the setup.
- CLI (Command Line Interface) − A hands-on experience in working with CLI will give an added advantage to you.
Steps to Configure and Connect to Mosquitto in Docker
In this section, we will explain step-by-step how you can configure and connect to Mosquitto in Docker environment −
Step 1: To pull the Mosquitto Image from the official docker hub
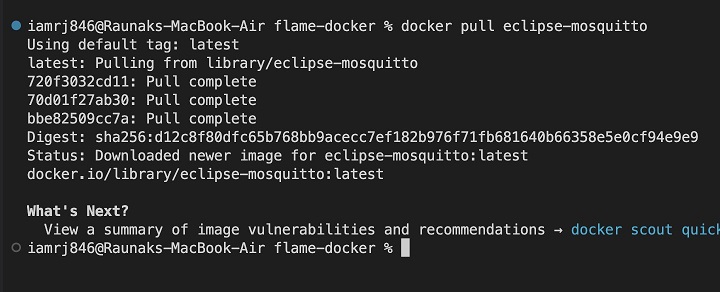
To start with, all we have to do is pull the Mosquitto image from the dockers official website. This can be done by opening a terminal or command prompt and by running the following command −
$ docker pull eclipse-mosquitto
This command will pull the latest image of the Mosquitto to your local environment.
Step 2: To create a docker network
If you need to perform inter-communication between multiple Docker containers and Mosquitto, you can use a Docker network. Note that this is an optional step and can be skipped at your convenience. Lets create a docker network. To achieve this use the following command −
$ docker network create mosquitto-net
The above command creates a Docker network.

In our case, the name of the Docker Network is "mosquitto-net".
Step 3: To create a Mosquitto configuration file
We need to have a configuration file for Mosquitto to specify settings such as the ports for the listeners and the security options. So lets begin by creating a mosquitto.conf file along with the data, log, and config directories using the following set of commands −
$ mkdir mosquitto-docker
$ cd mosquitto-docker
$ mkdir config data log
Create a file called mosquitto.conf inside the config directory and add the following configurations.
listener 1883
allow_anonymous true
Step 4: To start the Mosquitto docker container
Now let's create a Mosquitto docker container. This can be achieved by running the following command −
$ docker run -d --name mosquitto -v <path_to>/config:/mosquitto/config -v <path_to>/data:/mosquitto/data -v <path_to>/log:/mosquitto/log eclipse-mosquitto
Lets break down the above command to understand better −
- docker run − This is used to create and run the container.
- -d − This flag indicates the detached mode, so the container runs in the background.
- --name − This flag is used to assign a name to the container.
- -v − This is for mounting the volume to the container.
- -p 1883:1883 − This maps the port 1883 of the host to Mosquittos MQTT protocol messenger.
- eclipse-mosquitto − This is the name of the docker image that we have downloaded.

Step 5: To check if the container is running
Make sure that the container is up and running. To verify this, you can use the following command −
$ docker ps

Step 6: To view the logs of Mosquitto
We can check the logs of Mosquitto to make sure that there are no errors during the execution using the following command −
$ docker logs mosquitto

Step 7: To test Mosquitto
You can test the Mosquitto message broker by using the objects mosquitto_sub and mosquitto_pub. In case these tools are not locally available, we can run the following commands inside the docker −
For running the below command you can use two separate terminals.
In the first tab, to publish a message, run the following command −
$ docker run -it --rm --network bridge eclipse-mosquitto mosquitto_pub -h <host ip> -t test/topic -m <message>

In the second tab, to subscribe to a topic, run the following command −
$ docker run -it --rm --network bridge eclipse-mosquitto mosquitto_sub -h <host ip> -t test/topic

In the subscriber terminal tab, you will be able to see the received message from the publisher terminal tab.
Lets understand the flags used in the above command in detail −
- -it − This is the interactive terminal flag.
- rm − This flag ensures the timely removal of the container after exiting.
- --network bridge: This flag specifies that the container should use the bridge network
- .h <host ip> − This flag gives details about the hostname or IP of the MQTT broker that the publisher mosquitto_pub connects with.
- -t test/topic − This flag helps in the identification of the name of the topic on which the message to be sent is based.
- -m <message> − This flag tells about the message to be published.
Note − <host ip> of your system can be fetched by using the following command −
$ docker inspect -f "{{range .NetworkSettings.Networks}}{{.IPAddress}}{{end}}" mosquitto
This command is used to get information about the docker attributes such as containers in JSON format.

Conclusion
In this chapter, we have learned about setting up Mosquitto and managing it efficiently in docker environment. This setup ensures that your Mosquitto broker runs in an isolated environment, making it portable and easy to deploy. The environment is consistent, and you can easily share or integrate it with other Docker setups.
FAQs on Setting Mosquitto in Docker
There are some very Frequently Asked Questions about Setting Mosquitto with docker, this section tries to answer them briefly.
1. How to Upgrade the Mosquitto Version in Docker?
You can upgrade the Mosquitto version in Docker by running the following command: "docker pull eclipse-mosquitto". You can also add a version tag if needed, such as "eclipse-mosquitto:2.0" in the command to get a particular version of the library.
2. How to troubleshoot Mosquitto-related errors in Docker?
We can troubleshoot any errors by checking Mosquitto container logs using "docker logs mosquitto". Ensure the container has sufficient resources and check if port 1883 is not blocked or used by another service on your machine.