- Docker - Home
- Docker - Overview
- Docker - Installing on Linux
- Docker - Installation
- Docker - Hub
- Docker - Images
- Docker - Containers
- Docker - Registries
- Docker - Compose
- Docker - Working With Containers
- Docker - Architecture
- Docker - Layers
- Docker - Container & Hosts
- Docker - Configuration
- Docker - Containers & Shells
- Docker - Dockerfile
- Docker - Building Files
- Docker - Public Repositories
- Docker - Managing Ports
- Docker - Web Server
- Docker - Commands
- Docker - Container Linking
- Docker - Data Storage
- Docker - Volumes
- Docker - Networking
- Docker - Security
- Docker - Toolbox
- Docker - Cloud
- Docker - Build Cloud
- Docker - Logging
- Docker - Continuous Integration
- Docker - Kubernetes Architecture
- Docker - Working of Kubernetes
- Docker - Generative AI
- Docker - Hosting
- Docker - Best Practices
- Docker - Setting Node.js
- Docker - Setting MongoDB
- Docker - Setting NGINX
- Docker - Setting ASP.Net
- Docker - Setting MySQL
- Docker - Setting Go
- Docker - Setting Rust
- Docker - Setting Apache
- Docker - Setting MariaDB
- Docker - Setting Jupyter
- Docker - Setting Portainer
- Docker - Setting Rstudio
- Docker - Setting Plex
- Docker Setting - Flame
- Docker Setting - PostgreSql
- Docker Setting - Mosquitto
- Docker Setting - Grafana
- Docker Setting - Nextcloud
- Docker Setting - Pawns
- Docker Setting - Ubuntu
- Docker Setting - RabbitMQ
- Docker - Setting Python
- Docker - Setting Java
- Docker - Setting Redis
- Docker - Setting Alpine
- Docker - Setting BusyBox
- Docker Setting - Traefik
- Docker Setting - WordPress
- Docker Useful Resources
- Docker - Quick Guide
- Docker - Useful Resources
- Docker - Discussion
Docker - Setting Portainer
Portainer is a lightweight management UI that enables one to manage Docker environments with ease. It offers an intuitive interface through which users can easily deploy, manage, and debug containerized applications. Using Portainer, you can monitor a Docker setup, and manage containers, images, volumes, and networks from a centralized location.
Running Portainer with Docker not only simplifies the setup but also ensures it benefits from Docker's portability, scalability, and ease of use. By placing Portainer into a Docker container, you create for yourself a self-contained environment that is easy to deploy and maintain perfect fit for managing your Docker infrastructure.
Prerequisites to Dockerize Portainer
Before the Dockerization of Portainer, make sure that you have the following prerequisites in place −
- Install Docker − Ensure Docker is installed in your system. You can download and install Docker from the official Docker website.
- Basic Docker Knowledge − Knowledge of basic Docker concepts like overview of images, containers, and Dockerfile.
- Access to Terminal − You must have a command-line terminal opened to execute Docker commands.
- Internet Connection − In this article, we will use the official image of Portainer that is available on Docker Hub. An internet connection is necessary so that Docker can pull this image.
- Docker Hub Account − Another recommended resource is a Docker Hub account for those who want to push their custom images to a registry.
Having performed all these prerequisites, you are now ready to start setting up your Portainer project and Dockerizing it here.
Setting up a Portainer Project
Lets create a basic project structure. This setup will help us to organize our files and configurations, and it will make it easier to manage and version control the Portainer deployment.
Step 1: Create a Project Directory
Lets have a dedicated directory for our Portainer project. This directory will have all necessary files, like the Dockerfile, and any additional configuration files.
$ mkdir portainer-project
$ cd portainer-project
Step 2: Initialize Version Control and Docker
Next, you can initialize a Git repository within your project directory and Docker files as well.
$ git init
$ docker init

Step 3: Create a Configuration File
Depending on your needs, you can also create a configuration file to customize your Portainer deployment. For example, you can add environment variables or specify a volume for persistent data storage.
Create a config.yml file (if required) −
$ touch config.yml
For now, you can leave it empty or add configurations as needed.
Now that we have a project directory set up, lets outline the structure and the dependencies required for our Portainer project.
portainer-project/


 Dockerfile

 config.yml      # Optional: Configuration file for Portainer

 README.md       # Optional: Documentation for your project
Running Portainer in Local
Before Dockerize Portainer using custom Dockerfiles, lets first run Portainer locally using Docker. This will ensure that Portainer works correctly and provides a good baseline for creating the Dockerfile later.
Step 1: Pull the Portainer Image from the Docker Hub
We will start by pulling the official Portainer image from Docker Hub. This image already contains everything needed to run Portainer.
$ docker pull portainer/portainer-ce
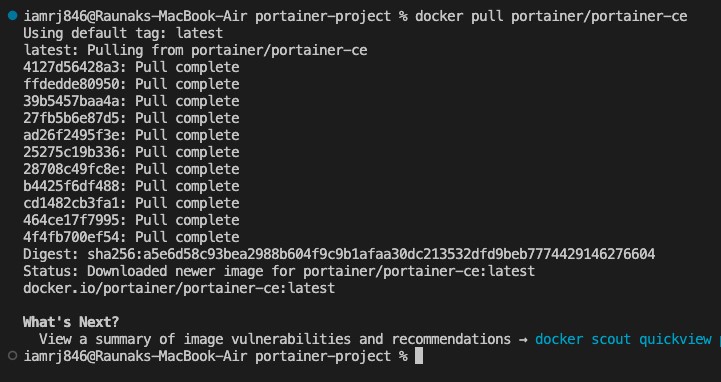
This image is a community edition of Portainer, it is free and includes all the features for managing Docker environments.
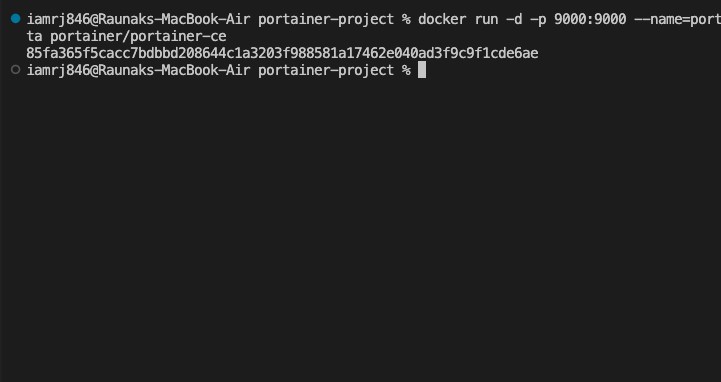
Step 2: Run Portainer as a Docker Container
Now we can run the Portainer container using the image that we pulled. The command below runs Portainer on port 9000, which is the default port for the Portainer web interface.
$ docker run -d -p 9000:9000 --name=portainer --restart=always -v
   /var/run/docker.sock:/var/run/docker.sock
   -v portainer_data:/data portainer/portainer-ce
Command Breakdown
- -d − Runs the container in detached mode (in the background).
- -p 9000:9000 − Maps port 9000 on your host machine to port 9000 in the container.
- --name=portainer − Names the container portainer.
- --restart=always − Ensures that the Portainer container restarts automatically if it stops or if the system reboots.
- -v /var/run/docker.sock:/var/run/docker.sock − Mounts the Docker socket to allow Portainer to communicate with the Docker daemon on your host.
- -v portainer_data:/data − Creates a Docker volume named portainer_data to persist Portainer's data, such as settings and configurations.
Step 3: Access the Portainer Web Interface
You can now access the Portainer web interface by opening a web browser and navigating to: http://localhost:9000.
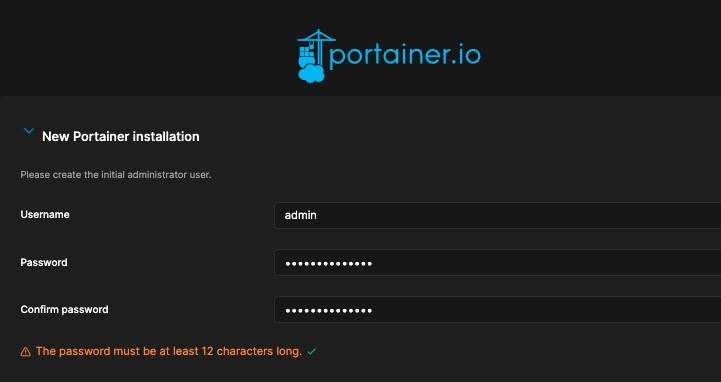
You will be prompted to create an admin user and set up your initial Portainer environment. You can follow the on-screen instructions to complete the setup.
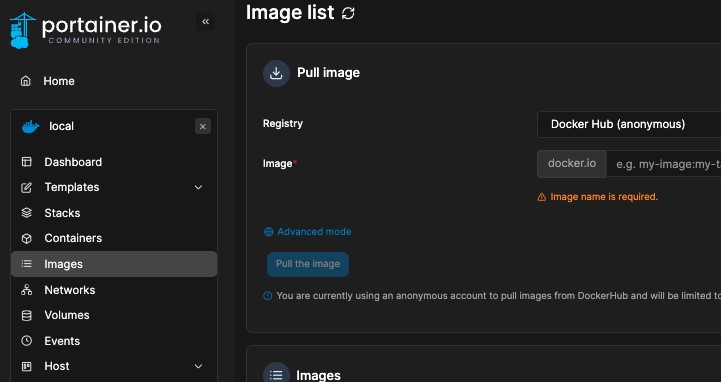
Step 4: Verify the Portainer Setup
You can check that Portainer is running correctly by logging into the web interface. You should see the Portainer dashboard. You can select your environment like local and you will be able to see all the images and containers in your local machine.
With Portainer running locally and verified, were ready to create a Dockerfile to Dockerize our custom Portainer setup.
Creating Dockerfile and Building Image
Lets create the Dockerfile now. In your portainer-project directory, create a file named Dockerfile −
$ touch Dockerfile
Step 1. Define the Dockerfile Contents
Open the Dockerfile in a text editor and add the following content −
# Use the official Portainer community edition image as the base image
FROM portainer/portainer-ce:latest

# Set environment variables (if any)
ENV PORTAINER_ADMIN_PASSWORD='yourpassword'

# Expose the Portainer port
EXPOSE 9000

# Define the default command to run Portainer
CMD ["portainer"]
Dockerfile Breakdown
- FROM portainer/portainer-ce:latest − It specifies that we are using the latest official Portainer community edition image as the base image for our custom Dockerfile.
- ENV PORTAINER_ADMIN_PASSWORD='yourpassword' − (Optional) It sets an environment variable for the Portainer admin password.
- EXPOSE 9000 − This line exposes port 9000, which is used by Portainer's web interface.
- CMD ["portainer"] − This is the default command to run Portainer.
Step 2: Build the Docker Image
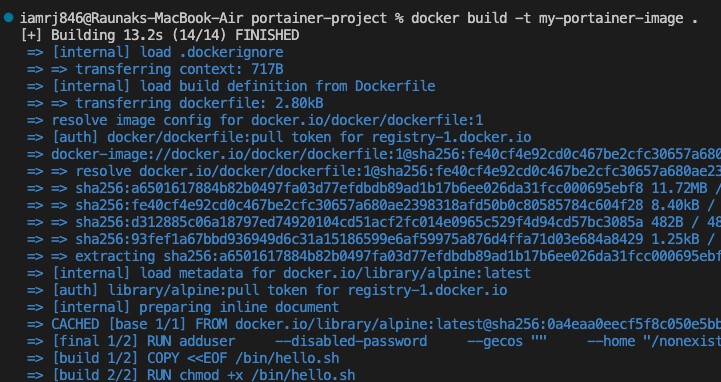
With this Dockerfile, we can build your custom Portainer image using the following command −
$ docker build -t my-portainer-image .
-t my-portainer-image − Tags the built image with the name my-portainer-image.
.: Specifies the current directory as the build context.
Step 3: Verify the Image Build
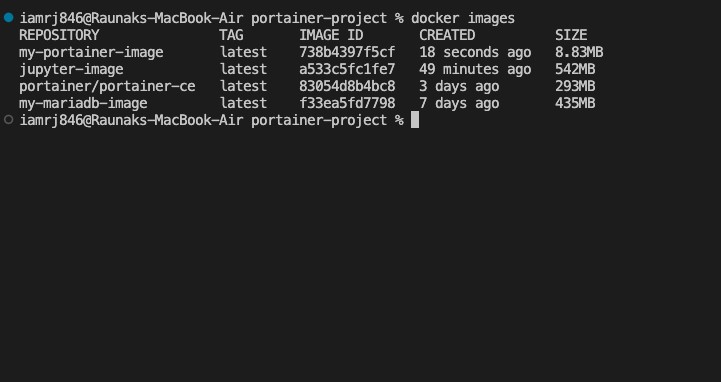
We can verify that our custom image has been created successfully by listing all Docker images −
$ docker images
You should see my-portainer-image listed among the available images.
Running the Portainer Docker Container
Now that we have our Docker image ready, we can run a Docker container using the custom Portainer image.
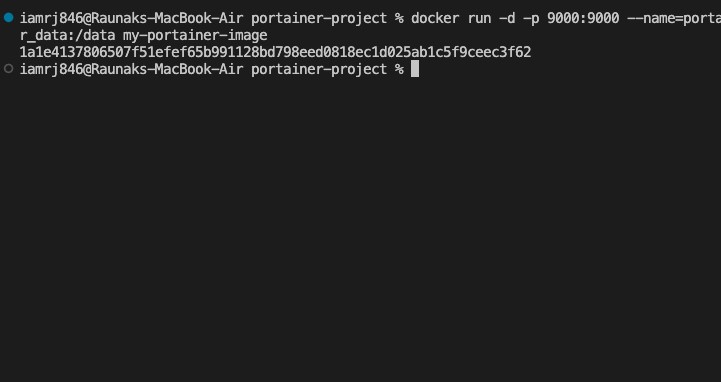
Step 1: Run the Portainer Container
We can use the following command to start a container from your custom Portainer image −
$ docker run -d -p 9000:9000 --name=portainer-container
   --restart=always -v /var/run/docker.sock:/var/run/docker.sock
      -v portainer_data:/data my-portainer-image
Command Breakdown
- -d − Runs the container in detached mode (in the background).
- -p 9000:9000 − Maps port 9000 on your host machine to port 9000 in the container. This allows you to access the Portainer web interface through http://localhost:9000.
- --name=portainer-container − Assigns a name to the container, making it easier to reference in Docker commands.
- --restart=always − Configures Docker to automatically restart the container if it stops or if the host system reboots.
- -v /var/run/docker.sock:/var/run/docker.sock − Mounts the Docker socket into the container so that Portainer can communicate with the Docker daemon on your host machine.
- -v portainer_data:/data − Creates and mounts a Docker volume named portainer_data to persist Portainer's data, such as configurations and settings.
- my-portainer-image − Specifies the name of the custom Docker image you built earlier.
Step 2: Access the Portainer Web Interface
Since the container is running, we can open a web browser and navigate to: http://localhost:9000.
We should see the Portainer login screen. We can log in with the admin credentials you set during the initial setup.
Conclusion
In this chapter, we explained how to Dockerize Portainer by creating a project, understanding the dependencies required for the project, creating a Dockerfile, and running the Portainer container.
We have created a portable and maintainable environment through which we will be able to manage our Docker environments with much efficiency. It also makes sure that our settings are replicable and consistent, which helps in the easy maintenance of the containers.
You can further customize Portainer, integrate it with your CI/CD pipelines, or manage complex Docker environments with the same.
FAQs on Dockerizing Portainer
There are some very Frequently Asked Questions(FAQ) about dockerizing portainer, this section tries to answer them briefly.
1. How do I set up Portainer in a Docker container?
To set up Portainer in a Docker container, create a Dockerfile using the official Portainer image. Configure the settings of Portainer inside this Docker container using environment variables or through configuration files inside the container. Expose the required port and start the container. Consider mapping a volume to persist data and configuration of Portainer.
2. What are the benefits of using Portainer with Docker?
Portainer is an easy way to manage Docker via a web-based interface since it provides an intuitive interface that deepens the user experience and interaction with most of the entities composing the Docker ecosystem, such as containers, images, and networks, among others. This makes creating and managing containers, deployment of apps, and resource usage much easier.
3. How do I secure Portainer access?
Lock down access to Portainer by setting up authentication and authorization in the Portainer interface. You can provide either password-based authentication or use one of multiple integrations with external authentication providers. Also, think about limiting access to Portainer based on IP addresses or other criteria.