- Docker - Home
- Docker - Overview
- Docker - Installing on Linux
- Docker - Installation
- Docker - Hub
- Docker - Images
- Docker - Containers
- Docker - Registries
- Docker - Compose
- Docker - Working With Containers
- Docker - Architecture
- Docker - Layers
- Docker - Container & Hosts
- Docker - Configuration
- Docker - Containers & Shells
- Docker - Dockerfile
- Docker - Building Files
- Docker - Public Repositories
- Docker - Managing Ports
- Docker - Web Server
- Docker - Commands
- Docker - Container Linking
- Docker - Data Storage
- Docker - Volumes
- Docker - Networking
- Docker - Security
- Docker - Toolbox
- Docker - Cloud
- Docker - Build Cloud
- Docker - Logging
- Docker - Continuous Integration
- Docker - Kubernetes Architecture
- Docker - Working of Kubernetes
- Docker - Generative AI
- Docker - Hosting
- Docker - Best Practices
- Docker - Setting Node.js
- Docker - Setting MongoDB
- Docker - Setting NGINX
- Docker - Setting ASP.Net
- Docker - Setting MySQL
- Docker - Setting Go
- Docker - Setting Rust
- Docker - Setting Apache
- Docker - Setting MariaDB
- Docker - Setting Jupyter
- Docker - Setting Portainer
- Docker - Setting Rstudio
- Docker - Setting Plex
- Docker Setting - Flame
- Docker Setting - PostgreSql
- Docker Setting - Mosquitto
- Docker Setting - Grafana
- Docker Setting - Nextcloud
- Docker Setting - Pawns
- Docker Setting - Ubuntu
- Docker Setting - RabbitMQ
- Docker - Setting Python
- Docker - Setting Java
- Docker - Setting Redis
- Docker - Setting Alpine
- Docker - Setting BusyBox
- Docker Setting - Traefik
- Docker Setting - WordPress
- Docker Useful Resources
- Docker - Quick Guide
- Docker - Useful Resources
- Docker - Discussion
Docker - Setting Traefik
Traefik is an advanced open-source reverse proxy tool. It can also work as a load balancer for HTTP requests. It is a popular choice among similar tools since it is dynamically configurable and easy to manage. It works well with Docker and Kubernetes. It provides simple methods for routing traffic, automatically providing SSL/TLS certificates, and creating amazingly designed dashboards.
Docker is a powerful tool that can be used to containerize the Traefik reverse proxy. It helps in the management and deployment of this reverse proxy tool. In this chapter, let's learn how to dockerize Traefik in simple and easy steps.
Prerequisites for Dockerizing Traefik
Before diving into setting up Traefik in docker, the following concepts require some revision −
- Basics of Docker − Knowledge of Docker terminologies such as containers, images, and docker files is a must.
- Postgres Basics − Basic understanding of Traefik and how the processes of load balancing and reverse proxy work.
- Docker Installation − Make sure that the docker is up and running. If it is not installed yet on your system, you can refer to Docker's official website.
- Text Editor − Keep in mind that having a text editor open in the system beforehand will make your life easier while typing intricate commands in the terminal.
- CLI (Command Line Interface) − You have to be comfortable in handling CLI commands in the terminal.
Steps to Configure Traefik
In this section, let's understand step-by-step how to configure Traefik −
Step 1: To pull the Traefik Image from the official hub
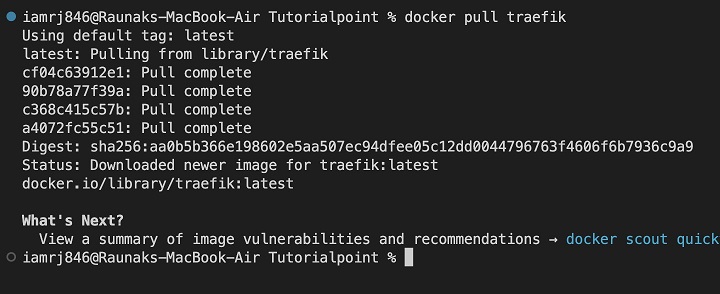
The initial step is to pull the official Traefik image from Dockers website. This can be done by opening the terminal and running the following command −
$ docker pull traefik
This command will pull the latest image of Traefik to your local environment.
Step 2: To create a directory for Traefik
Let's start by creating a directory for the Traefik setup.
$ mkdir traefik
Step 3: To create a Traefik configuration file
Now its time to create a Traefik configuration file, which will be a YAML file −
$ echo > traefik/traefik.yml
The content of the traefik.yaml is as follows −
api:
   dashboard: true # Optional for enabling web dashboard
   insecure: true # Optional to enter dashboard without authentication
   debug: false # Optional to enable debug logs
entryPoints:
   web:
   address: ":80"
 # Optional if need to use HTTPS instead of HTTP
 #    http:
 #    redirections:
 #       entryPoint:
 #          to: websecure
 #          scheme: https
   websecure:
      address: ":443"
serversTransport:
   insecureSkipVerify: true
providers:
   docker:
      endpoint: "unix:///var/run/docker.sock"
      exposedByDefault: false
      network: proxy # Optional to only use the proxy network of Docker.
certificatesResolvers:
   letencrypt:
      acme:
         email: <youremail>@email.com
         storage: /certs/acme.json
         # caServer: https://acme-v02.api.letsencrypt.org/directory # prod (default)
         caServer: https://acme-staging-v02.api.letsencrypt.org/directory # staging
         httpChallenge:
            entryPoint: web
Step 4: To create a Docker Compose File for Traefik
Now let us create the docker-compose.yml file. The contents of which are mentioned as follows −
services:
   traefik:
      image: traefik:v3.0
      container_name: traefik
      restart: unless-stopped
      security_opt:
         - no-new-privileges:true
      environment:
         - TZ=Europe/Paris # Change this as per your timezone
      networks:
         - frontend
      ports:
         - 80:80 # HTTP entry points
         - 443:443 # HTTPS entry points
         - 8080:8080 # Dashboard Wen=b GUI
      volumes:
         - /var/run/docker.sock:/var/run/docker.sock:ro # socket for the Docker to watch Traefik
         - ./traefik.yml:/traefik.yml:ro # Traefik configuration file
         - traefik-certs:/certs # Docker volume to store certificates and acme files
volumes:
   traefik-certs:
      name: traefik-certs

networks:
   frontend:
      driver: bridge
Step 5: To create the acme.json file
Now lets create the acme.json file which is used to store the user permissions and SSL certificates.
{
   "email": "your@email.com",
   "storage": "acme/",
   "ca": "https://acme-v02.api.letsencrypt.org",
   "dns": {
      "provider": "cloudflare"
   }
}
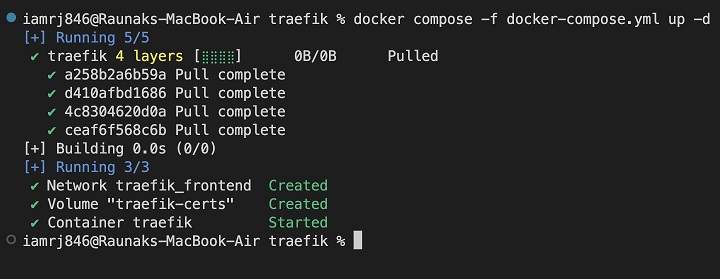
Step 6: To Start the Container
Now that the configuration setup is done, we are ready to run the container in Docker using the following command −
$ docker compose -f docker-compose.yml up -d
Lets understand the command in detail −
- docker compose − This is used to run docker applications having multiple containers using docker-compose.yml file.
- -f − This flag indicates the path of the file, in our case the file name is docker-compose.yml in the traefik directory.
- up − This command tells the docker to start the services present in the docker compose file.
- -d − This flag represents the detached mode.
Step 7: To Configure your Service for Traefik
Lets update the configurations to use Traefik as a reverse proxy. This can be done by creating a docker-compose.yaml file for a web service in a separate directory as follows −
$ mkdir webapp
$ cd webapp
$ touch docker-compose.yml
services:
   webapp:
      image: traefik/webapp
      networks:
         - web
      labels:
         - "traefik.enable=true"
         - "traefik.http.routers.webapp.rule=Host(`yourdomain.com`)"
         - "traefik.http.services.webapp.loadbalancer.server.port=80"
         - "traefik.http.routers.webapp.entrypoints=web,websecure"
         - "traefik.http.routers.webapp.tls=true"
         - "traefik.http.routers.webapp.tls.certresolver=http"

networks:
   web:
      external: true
Let's get some information about the configuration we have used above −
- traefik.enable=true − This label instructs Traefik to manage the service properly.
- traefik.http.routers.webapp.rule − This specifies the domain that will be used to perform routing.
- traefik.http.services.webapp.loadbalancer.server.port − This label is used to map the container port.
- traefik.http.routers.webapp.entrypoints − This label gives information about the entry points to be used.
- traefik.http.routers.webapp.tls=true − This label enables HTTPS and automatically handles the certificates.
You can run the webapps docker compose file using the following command −
$ docker compose -f webapp/docker-compose.yml up -d
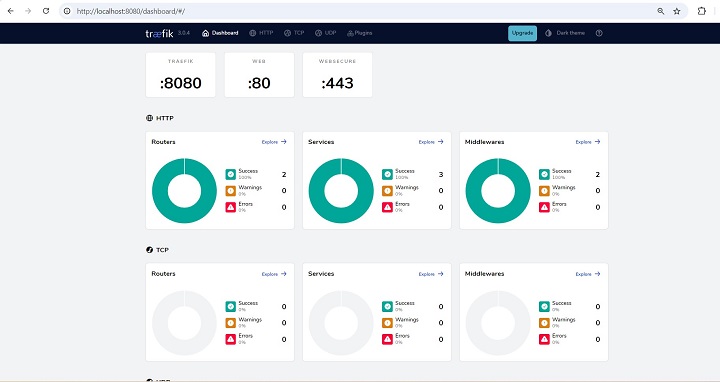
Step 8: Check Whether the Setup is Working Properly
Now that the container is up and running. We can go to the following URL: http://<Server IP>:8080.
Note − Since you are running on your machine you can directly replace <Server IP> with localhost or 127.0.0.1.
The landing page of the above URL looks like below −
Conclusion
In this chapter, we have discussed how to containerize Traefik with Docker. Traefik is used to handle network traffic along with managing the TLS/SSL certificates. This setup is easy to handle as it is portable and consistent across different environments, and you can get it up and running without much fuss. This setup can be smoothly integrated with other Docker-based systems and shared with others as needed.
FAQs on Containerizing Traefik with Docker
In this section, we have collected a set of Frequently Asked Questions on containerizing Traefik with Docker −
1. How to upgrade the Traefik version in the docker?
We can upgrade the Traefik version in Docker by connecting to the shell of the container using the Docker exec command and manually updating the version. We can also pull the latest image of Traefik using the command "docker pull traefik".
Also, if needed, the "docker-compose.yml" file can be updated. In case any updation is performed, do not forget to restart the container using the command "docker-compose up -d".
2. How to troubleshoot Traefik-related errors in Docker?
To check if any errors have occurred during any phase in the execution of commands related to Traefik, you can make use of the logs.
To check the logs related to Traefik, use the command "docker logs traefik". To avoid errors related to Traefik execution in docker, no other services should run on port 443 or 80.