- Docker - Home
- Docker - Overview
- Docker - Installing on Linux
- Docker - Installation
- Docker - Hub
- Docker - Images
- Docker - Containers
- Docker - Registries
- Docker - Compose
- Docker - Working With Containers
- Docker - Architecture
- Docker - Layers
- Docker - Container & Hosts
- Docker - Configuration
- Docker - Containers & Shells
- Docker - Dockerfile
- Docker - Building Files
- Docker - Public Repositories
- Docker - Managing Ports
- Docker - Web Server
- Docker - Commands
- Docker - Container Linking
- Docker - Data Storage
- Docker - Volumes
- Docker - Networking
- Docker - Security
- Docker - Toolbox
- Docker - Cloud
- Docker - Build Cloud
- Docker - Logging
- Docker - Continuous Integration
- Docker - Kubernetes Architecture
- Docker - Working of Kubernetes
- Docker - Generative AI
- Docker - Hosting
- Docker - Best Practices
- Docker - Setting Node.js
- Docker - Setting MongoDB
- Docker - Setting NGINX
- Docker - Setting ASP.Net
- Docker - Setting MySQL
- Docker - Setting Go
- Docker - Setting Rust
- Docker - Setting Apache
- Docker - Setting MariaDB
- Docker - Setting Jupyter
- Docker - Setting Portainer
- Docker - Setting Rstudio
- Docker - Setting Plex
- Docker Setting - Flame
- Docker Setting - PostgreSql
- Docker Setting - Mosquitto
- Docker Setting - Grafana
- Docker Setting - Nextcloud
- Docker Setting - Pawns
- Docker Setting - Ubuntu
- Docker Setting - RabbitMQ
- Docker - Setting Python
- Docker - Setting Java
- Docker - Setting Redis
- Docker - Setting Alpine
- Docker - Setting BusyBox
- Docker Setting - Traefik
- Docker Setting - WordPress
- Docker Useful Resources
- Docker - Quick Guide
- Docker - Useful Resources
- Docker - Discussion
Docker Working with Kubernetes
Kubernetes and Docker work together to simplify application deployment and management. Docker packs an application and its dependencies into a portable container that guarantees the same environment at development, staging, testing, and production. Next, Kubernetes orchestrates all these Docker containers through automation - tasks such as scaling, load balancing, self-healing, and many more.
Kubernetes clusters comprise worker nodes on which the Docker containers run, and a master node managing the state of the cluster. By defining desired states of applications in YAML files, Kubernetes continuously monitors the Deployment while adhering to the specifications, therefore providing high availability and efficient resource utilization.
In this chapter, lets look at a practical example of how Docker containers and Kubernetes work together to make the deployment and management of clusters easier.
Preparing the Java Spring Boot Application Package
- Visit Spring Initializr − Open your favorite web browser and navigate to https://start.spring.io/.
- Choose Dependencies − Here, select dependencies for your application. For building a simple REST API, you can select Spring Web.
- Create Project − Select "Generate" then "Download ZIP File".
- Import Project − Import the project into your favorite IDE, for example, IntelliJ IDEA, or Eclipse.
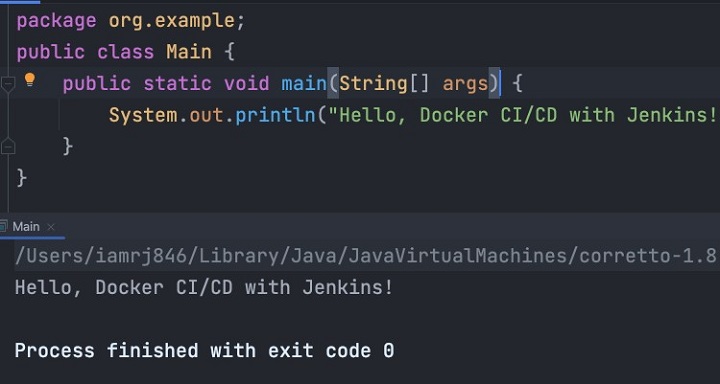
REST Endpoints with RESTController
Now let's create a normal REST controller −
package com.example.demo;

import org.springframework.web.bind.annotation.GetMapping;
import org.springframework.web.bind.annotation.RestController;

@RestController
public class HelloController {

   @GetMapping("/")
   public String hello() {
      return "Hello from Spring Boot!";
   }
}
Building the Application
To package the application into a JAR, run the following Maven command −
$ mvn clean package
The generated JAR file will be placed in the target directory.
Additional Considerations
- Dependency Management − Have the right dependency management with Maven or Gradle to avoid a conflict somewhere else.
- Configuration − Make configuration externalizable, by considering configuration to be kept outside the application in properties files or even as environment variables.
- Testing − Write unit and integration tests to ensure code quality.
With the Spring Boot application packaged, we're ready to create a Docker image.
Building the Docker Image
Lets create a Dockerfile to define the instructions for our Spring Boot application to build a Docker image.
Writing a Dockerfile
Create a file named Dockerfile in the root directory of your Spring Boot project.
FROM openjdk:17-jdk-alpine

WORKDIR /app

COPY target/*.jar app.jar

ENTRYPOINT ["java", "-jar", "app.jar"]
- FROM openjdk:17-jdk-alpine − This provides the base image.
- WORKDIR /app − Sets the working directory inside a container.
- COPY target/*.jar app.jar − It will copy the jar file created in the target folder to the /app directory in the container.
- ENTRYPOINT ["java", "-jar", "app.jar"] − Command to set the entry point to be executed via the container upon this command bringing it up; in this case, a Java JAR.
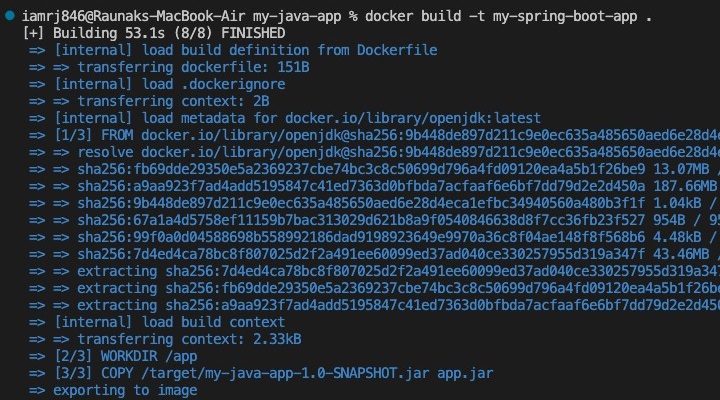
You can build the Docker image with this command −
$ docker build -t my-spring-boot-app .
- -t my-spring-boot-app − Tags your image as my-spring-boot-app.
- . (dot) − Indicates the current directory as the build context.
Run the following command to verify that the image was created successfully −
$ docker images
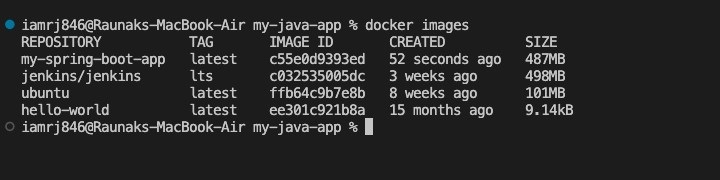
The newly created image should be there in the output.
Additional Considerations
- Base Image − Choose the base image that meets your needs for application requirements and performance.
- Multi-Stage Builds − Consider utilizing multi-stage builds while optimizing image size, and separating build and runtime environments.
- Dockerfile best practices − Use best practices for writing docker files to reduce image size.
Now that we have the Docker image, we will be able to deploy it into our Kubernetes cluster.
Kubernetes Installation and Setup
To deploy our Spring Boot application, we require a Kubernetes cluster. We'll see how to set up a local Kubernetes environment using Minikube.
Setting up Minikube
Minikube is one tool that lets you set up a single-node Kubernetes.
Prerequisites
- Virtualization enabled (e.g., VirtualBox, Hyper-V)
Installation
1. Download the Minikube Binary −
curl -L https://github.com/minikube/minikube/releases/latest/download/minikube-linux-amd64 > minikube
chmod +x minikube
sudo mv minikube /usr/local/bin/
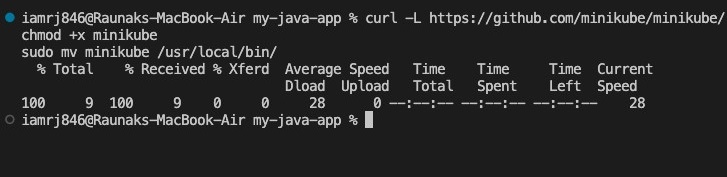
Replace minikube-linux-amd64 with the appropriate binary for your operating system.
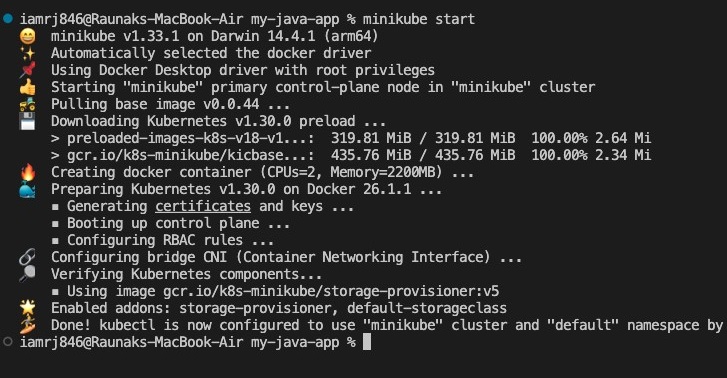
2. Start the Minikube cluster −
$ minikube start
Installation of kubectl
Kubectl is a command-line operable tool for controlling Kubernetes.
Installation
1. Download the Kubectl binary −
curl -LO https://dl.k8s.io/release/$(curl -L -s https://dl.k8s.io/release/stable.txt)/bin/linux/amd64/kubectl
chmod +x kubectl
sudo mv kubectl /usr/local/bin/
Replace linux/amd64 with the appropriate binary for your operating system.
2. Configure kubectl to use Minikube −
minikube config set context minikube
Verifying the Installation
To verify `minikube` for local and your cluster setup with `kubectl`, run −
minikube status
kubectl cluster-info
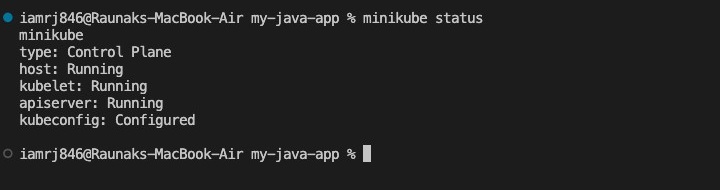
This will fetch the details of the Minikube cluster and resources running in your environment.
Additional Considerations
- Kubernetes Distributions − It is a good idea to check other Kubernetes releases, just like K3s or MicroK8s, for different use cases.
- Cloud Provided − For production platforms, cloud providers offer managed Kubernetes services such as Google Kubernetes Engine, Amazon EKS, and Azure Kubernetes Service.
- Cluster Configuration − Customize the Minikube configuration based on your resource constraints and requirements.
Finally, with Minikube and kubectl installed, we're now ready to go ahead and start writing the necessary YAML configurations to deploy our application.
Set Up the Kubernetes Cluster
Here are the key Kubernetes components −
- Master Node − Controls the cluster and manages worker nodes.
- Worker Nodes − Run containerized applications.
- Pods − The smallest deployable unit in Kubernetes, containing one or more containers.
- Deployments − Manage the desired state of Pod replicas.
- Services − Expose applications running on Pods as network services.
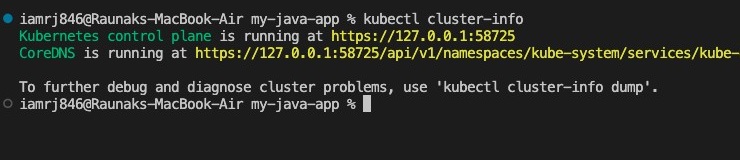
Checking Cluster Status
You can use the below command to verify your Minikube cluster is running correctly −
$ kubectl cluster-info
The result of the above command will display information about your cluster, which will contain the Kubernetes version and master address.
Checking Node Status
To see the nodes in your cluster, you can use the below command −
$ kubectl get nodes
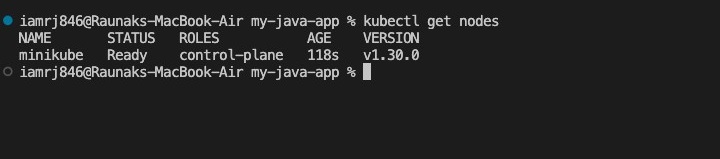
You will see a single node listed, which is the Minikube node.
Additional Considerations
- Cluster Size − For production environments, figure out the optimal number of nodes based on the workload.
- Node Resources − You should configure node resources (CPU, memory) to match your application's requirements.
- Network Configuration − Please ensure proper network connectivity between nodes and the external environments.
We're now ready to create the YAML configurations for our application.
Write the YAML Configurations
You need a YAML configuration file to deploy your Spring Boot application on Kubernetes. You can define the resources required for your application, such as deployments and services in this file.
Deployment Configuration
A Deployment in Kubernetes manages a set of identical pods. Heres an example YAML file to define a Deployment for your application −
apiVersion: apps/v1
kind: Deployment
metadata:
   name: my-spring-boot-app
spec:
   replicas: 3
   selector:
      matchLabels:
         app: my-spring-boot-app
   template:
      metadata:
         labels:
            app: my-spring-boot-app
      spec:
         containers:
         - name: my-spring-boot-app
            image: my-spring-boot-app:latest
            ports:
            - containerPort: 8080
- replicas − Specifies the number of pod instances.
- matchLabels − Ensures that the Deployment manages the correct pods.
- image − Refers to the Docker image we built earlier.
- containerPort − Defines the port the application listens on inside the container.
Service Configuration
A Service exposes your application to the network. Heres an example of a Service YAML file −
apiVersion: v1
kind: Service
metadata:
   name: my-spring-boot-app-service
spec:
   type: NodePort
   selector:
      app: my-spring-boot-app
   ports:
      - protocol: TCP
        port: 80
        targetPort: 8080
- type − NodePort exposes the service on each nodes IP at a static port.
- port − The port exposed by the service.
- targetPort − The port on the pod that the service will forward traffic to.
Applying Configurations
To deploy your application, you can use kubectl to apply these configurations −
kubectl apply -f deployment.yaml
kubectl apply -f service.yaml
Verifying Deployment
To check the status of your pods and services, you can use the below commands −
kubectl get pods
kubectl get services
You will see your application running and the service exposing it.
Accessing the Application
To access your application, you can use the Minikube IP and the NodePort assigned to your service −
$ minikube service my-spring-boot-app-service
On running this command will open your browser to the service URL.
Additional Considerations
- Scaling − You should always adjust the number of replicas in the Deployment YAML to handle more load based on the traffic.
- Security − Consider adding security contexts and network policies.
- Monitoring − In production applications, you should implement monitoring solutions like Prometheus and Grafana for observability.
With these configurations, you have successfully deployed your Spring Boot application on a Kubernetes cluster.
Conclusion
In other words, the integration of Docker into Kubernetes provides an effective way of deploying and managing applications. While Docker containers ensure a consistent environment across all development stages, Kubernetes automatically orchestrates them to achieve scalability, high availability, and optimal resource utilization. Localizing a Kubernetes environment with Minikube configurations using YAML will make a developer's workflow simple with easy deployment and maintenance of robust applications.
FAQs on Docker Working with Kubernetes
1. What is the difference between Docker and Kubernetes?
Docker is a software for building, executing, and managing containers. Mostly it installs applications and their requirements in standard packages called containers. On the other hand, Kubernetes is also an orchestration platform that deals with operations such as automatic deployment or scaling applications running on multiple hosts. Since Docker operates around a single container, Kubernetes deals with the implementation, scaling, and management of static sets of containers.
2. How does Kubernetes orchestrate containers?
Kubernetes orchestrates containers through a resource range that includes pods, deployments, services, and others. Pods are classified as groups of containers sharing resources. Deployments are responsible for managing the desired state of pod replicas, with services that maintain a stable network endpoint for a set of pods. Kubernetes automatically handles container life cycle, load balancing, or scaling, as defined in the configurations.