- Kubernetes Tutorial
- Kubernetes - Home
- Kubernetes - Overview
- Kubernetes - Architecture
- Kubernetes - Setup
- Kubernetes - Setup on Ubuntu
- Kubernetes - Images
- Kubernetes - Jobs
- Kubernetes - Labels & Selectors
- Kubernetes - Namespace
- Kubernetes - Node
- Kubernetes - Service
- Kubernetes - POD
- Kubernetes - Replication Controller
- Kubernetes - Replica Sets
- Kubernetes - Deployments
- Kubernetes - Volumes
- Kubernetes - Secrets
- Kubernetes - Network Policy
- Advanced Kubernetes
- Kubernetes - API
- Kubernetes - Kubectl
- Kubernetes - Kubectl Commands
- Kubernetes - Creating an App
- Kubernetes - App Deployment
- Kubernetes - Autoscaling
- Kubernetes - Dashboard Setup
- Kubernetes - Helm Package Management
- Kubernetes - CI/CD Integration
- Kubernetes - Persistent Storage and PVCs
- Kubernetes - RBAC
- Kubernetes - Logging & Monitoring
- Kubernetes - Service Mesh with Istio
- Kubernetes - Backup and Disaster Recovery
- Managing ConfigMaps and Secrets
- Running Stateful Applications
- Kubernetes Useful Resources
- Kubernetes - Quick Guide
- Kubernetes - Useful Resources
- Kubernetes - Discussion
Backup and Disaster Recovery in Kubernetes
Kubernetes is a powerful platform for managing containerized applications, but like any system, it is vulnerable to data loss, corruption, and unexpected failures. Whether due to accidental deletions, hardware failures, or cyberattacks, losing data can disrupt operations and cause significant downtime. To keep our applications running smoothly, we need a solid backup and disaster recovery strategy.
In this guide, we will explore how we can protect our Kubernetes clusters from unexpected failures. We will discuss best practices for backing up data, look at the most popular tools available, and walk through the recovery process step by step.
Understanding Backup Strategy
To ensure that our Kubernetes environment remains resilient, we need to back up key components, including:
- Etcd Data: This is the brain of our cluster, storing all configurations, secrets, and state information.
- Persistent Volumes (PVs): These store critical application data that must be preserved.
- Application Manifests: YAML files that define Deployments, Services, and other resources.
- RBAC and Configurations: Ensuring our access control settings and cluster configurations remain intact.
By automating and scheduling our backups, we can minimize the risk of data loss and speed up recovery if something goes wrong.
Choosing the Right Backup Tools
Luckily, we donât have to start from scratchâseveral tools make Kubernetes backups easy. Letâs take a look at some of the most popular ones.
1. Velero
Velero is an open-source tool designed to back up and restore Kubernetes clusters. It supports persistent volume snapshots and allows us to migrate workloads between clusters.
Installing MinIO
MinIO will serve as our S3-compatible storage backend for Velero.
Create a Namespace for MinIO
$ kubectl create namespace minio
Output:
namespace/minio created
Add the MinIO Helm Repository
$ helm repo add minio https://charts.min.io/
$ helm repo update
Output
"minio" has been added to your repositories
Hang tight while we grab the latest from your chart repositories...
...Successfully got an update from the "minio" chart repository
Update Complete. Happy Helming!
Deploy MinIO using Helm
$ helm install minio minio/minio --namespace minio \
  --set accessKey=minioadmin \
  --set secretKey=minioadmin \
  --set persistence.size=10Gi
Output
NAME: minio
LAST DEPLOYED: Mon Mar 17 10:25:30 2025
NAMESPACE: minio
STATUS: deployed
REVISION: 1
NOTES
MinIO can be accessed via port 9000 on the following DNS name from within your cluster −
minio.minio.svc.cluster.local
To access MinIO from localhost, run the below commands −
export POD_NAME=$(kubectl get pods --namespace minio -l "release=minio"
 -o jsonpath="{.items[0].metadata.name}")
kubectl port-forward $POD_NAME 9000 --namespace minio
Read more about port forwarding here: KubeCon + CloudNativeCon Europe 2025
You can now access MinIO server on http://localhost:9000. Follow the below steps to connect to MinIO server with mc client
- Download the MinIO mc client - https://min.io/docs/minio/linux/reference/minio-mc.html#quickstart
- export MC_HOST_minio-local=http://minioadmin:minioadmin@localhost:9000
- mc ls minio-local
Verify MinIO is Running
$ kubectl get pods -n minio
Output:
NAME                   READY   STATUS    RESTARTS      AGE
minio-0                1/1     Running   0             3m12s
minio-1                1/1     Running   0             3m12s
minio-10               1/1     Running   0             3m12s
minio-11               1/1     Running   0             3m12s
minio-12               1/1     Running   0             3m12s
minio-13               1/1     Running   0             3m12s
minio-14               1/1     Running   0             3m12s
minio-15               0/1     Pending   0             3m12s
minio-2                1/1     Running   0             3m12s
minio-3                1/1     Running   0             3m12s
minio-4                1/1     Running   0             3m12s
minio-5                1/1     Running   0             3m12s
minio-6                1/1     Running   0             3m12s
minio-7                1/1     Running   0             3m12s
minio-8                1/1     Running   0             3m12s
minio-9                1/1     Running   0             3m12s
minio-post-job-gjw2h   1/1     Running   2 (61s ago)   3m12s
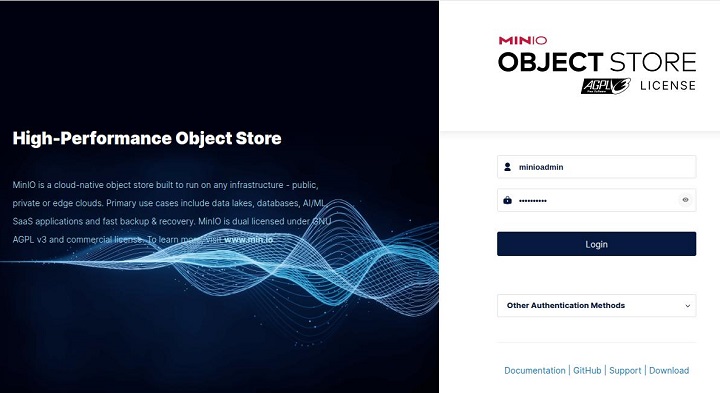
Access MinIO Locally
export POD_NAME=$(kubectl get pods --namespace minio -l "release=minio"
   -o jsonpath="{.items[0].metadata.name}")
$ kubectl port-forward $POD_NAME 9000 --namespace minio
Output
Forwarding from 127.0.0.1:9000 -> 9000
Forwarding from [::1]:9000 -> 9000
Handling connection for 9000

MinIO's web interface is now accessible at: http://localhost:9001
Default Credentials:
Username: minioadmin
Password: minioadmin
Installing MinIO Client (mc)
MinIO provides mc (MinIO Client) to interact with our storage.
Download and Install mc
$ wget https://dl.min.io/client/mc/release/linux-amd64/mc
$ chmod +x mc
$ sudo mv mc /usr/local/bin/
Output
--2025-03-17 10:20:45-- https://dl.min.io/client/mc/release/linux-amd64/mc Resolving dl.min.io... 192.168.1.1 Connecting to dl.min.io|192.168.1.1|:443... connected. HTTP request sent, awaiting response... 200 OK Length: 12034567 (12M) [application/octet-stream] Saving to: âmcâ mc 100%[================>] 11.48M 5.32MB/s in 2.2s 2025-03-17 10:20:47 (5.32 MB/s) - âmcâ saved [12034567/12034567]
Verify mc Installation
$ mc --version
Output
mc version RELEASE.2025-03-12T17-29-24Z (commit-id=c1d5d4cbb4caf05afef3ea06a91a56bd778336de)
Runtime: go1.24.1 linux/amd64
Configure MinIO Client
$ mc alias set local http://localhost:9000 minioadmin minioadmin
Output:
mc: Configuration written to `/root/.mc/config.json`. Please update your access credentials.
mc: Successfully created `/root/.mc/share`.
mc: Initialized share uploads `/root/.mc/share/uploads.json` file.
mc: Initialized share downloads `/root/.mc/share/downloads.json` file.
mc: Alias successfully set!
Create a Bucket for Velero
$ mc mb local/velero
Output
Bucket created successfully `local/velero`
Installing Velero with MinIO
Now, we'll configure Velero to use MinIO for backups.
Create a Credentials File for Velero
$ cat <<EOF > /tmp/cloud-credentials
[default]
aws_access_key_id = minioadmin
aws_secret_access_key = minioadmin
EOF
Add the Velero Helm Repository
$ helm repo add vmware-tanzu https://vmware-tanzu.github.io/helm-charts
$ helm repo update
Output
"vmware-tanzu" has been added to your repositories Update Complete. âHappy Helming!â
Install Velero Using Helm
$ kubectl create namespace velero
$ helm install velero vmware-tanzu/velero --namespace velero \
  --set-file credentials.secretContents.cloud=/tmp/cloud-credentials \
  --set configuration.backupStorageLocations[0].name=default \
  --set configuration.backupStorageLocations[0].provider=aws \
  --set configuration.backupStorageLocations[0].bucket=velero \
  --set configuration.backupStorageLocations[0].config.region=minio \
  --set configuration.backupStorageLocations[0].config.s3Url=http://minio.minio.svc:9000 \
  --set configuration.volumeSnapshotLocations[0].name=default \
  --set configuration.volumeSnapshotLocations[0].provider=aws
Output
NAME: velero
LAST DEPLOYED: Tue Mar 18 08:15:42 2025
NAMESPACE: velero
STATUS: deployed
REVISION: 1
TEST SUITE: None
NOTES:
Velero has been successfully installed in the "velero" namespace.
To verify that Velero is running correctly, use the following command:
  kubectl get pods -n velero
To create a backup, run:
  velero backup create my-cluster-backup --include-namespaces default
For more details on using Velero, visit:
  https://velero.io/docs/
Verify Velero is Running:
$ kubectl get pods -n velero
Output
NAME                      READY   STATUS    RESTARTS   AGE
velero-5f99d9d96f-b8x9v   1/1     Running   0          1m
Creating and Restoring Backups
Create a Backup
$ velero backup create my-cluster-backup --include-namespaces default
Output
Backup request "my-cluster-backup" submitted successfully.
Run `velero backup describe my-cluster-backup` or `velero backup logs my-cluster-backup` for details.
Check Backup Status
$ velero backup get
Output
NAME                  STATUS      CREATED                         EXPIRES   STORAGE LOCATION   SELECTOR
my-cluster-backup     Completed   2025-03-18 07:20:00 +0000 UTC   29d       default            <none>
Restore a Backup
$ velero restore create --from-backup my-cluster-backup
Output
Restore request "my-cluster-backup-restore" submitted successfully.
Run `velero restore describe my-cluster-backup-restore` or `velero restore logs my-cluster-backup-restore` for details.
2. Kasten K10
Kasten K10 is an enterprise-grade backup and disaster recovery solution designed for Kubernetes environments. It simplifies data protection with an intuitive interface and automated workflows.
Installing Kasten K10
Create a dedicated namespace for Kasten K10:
$ kubectl create namespace kasten-io
Output
namespace/kasten-io created
Add the Kasten Helm repository:
$ helm repo add kasten https://charts.kasten.io/
Output
"kasten" has been added to your repositories
Update the Helm repository to get the latest charts:
$ helm repo update
Output
helm repo update Hang tight while we grab the latest from your chart repositories... ...Successfully got an update from the "kubelet-csr-approver" chart repository ...Successfully got an update from the "kubernetes-dashboard" chart repository ...Successfully got an update from the "rimusz" chart repository ...Successfully got an update from the "metrics-server" chart repository ...Successfully got an update from the "kasten" chart repository Update Complete. âHappy Helming!â
Install Kasten K10 using Helm:
$ helm install k10 kasten/k10 --namespace=kasten-io
Output
NAME: k10
LAST DEPLOYED: Tue Mar 18 08:48:16 2025
NAMESPACE: kasten-io
STATUS: deployed
REVISION: 1
TEST SUITE: None
NOTES:
Thank you for installing Kastenâs K10 Data Management Platform 7.5.7!
Documentation can be found at https://docs.kasten.io/.
How to access the K10 Dashboard:
To establish a connection to it use the following `kubectl` command:
`kubectl --namespace kasten-io port-forward service/gateway 8080:80`
The K10 dashboard will be available at: `http://127.0.0.1:8080/k10/#/`
Creating a Backup with Kasten K10
To begin, access the Kasten K10 dashboard by forwarding the service port:
$ kubectl --namespace kasten-io port-forward service/gateway 8080:80
Once the port-forwarding is active, open the browser and navigate to http://127.0.0.1:8080/k10/#/

Creating a Backup Policy
To create a backup policy, follow these steps:
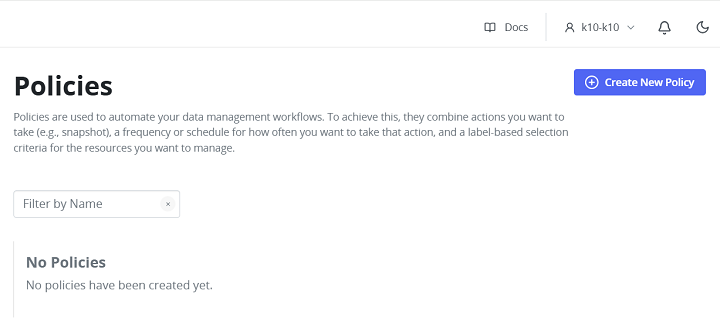
- Open the Kasten K10 dashboard and navigate to the Policies section in the left-hand menu.
- Click New Policy and provide a meaningful name (e.g., daily-backup).
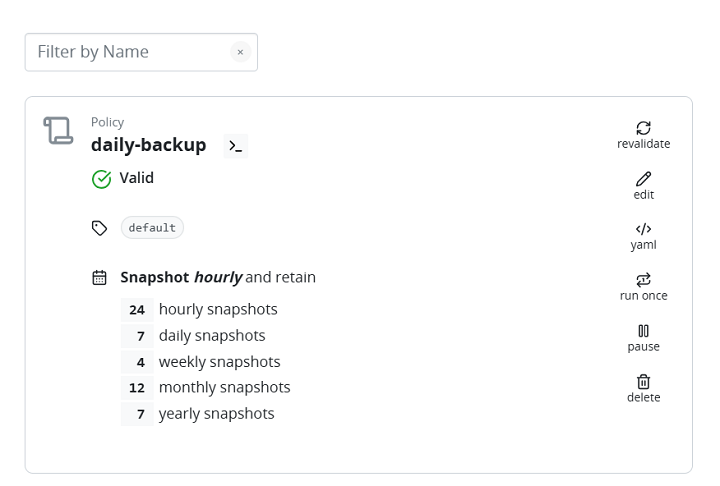
- Choose Snapshot as the backup action to take application snapshots.
- Set the backup frequency based on your needs: Hourly, Daily, Weekly, Monthly, Yearly, or On-Demand.
- Adjust Snapshot Retention to define how many backups to keep.
- Select the applications to back up by choosing By Name, By Labels, or None to target specific applications.
- (Optional) Enable Backup Export if using cloud storage (AWS S3, MinIO, Google Cloud) and configure the storage location.
- (Optional) Configure Advanced Settings, such as enabling pre- and post-snapshot hooks for automation or selecting a Kanister Profile if required.
- Click Submit to save and apply the policy.
The following output confirms the backup has been created:
Restoring an Application from a Backup
If a restore is needed, follow these steps −
- Open the Kasten K10 dashboard and navigate to the Applications page.
- Locate the application to restore (e.g., default), click the three-dot menu (), and select Restore.
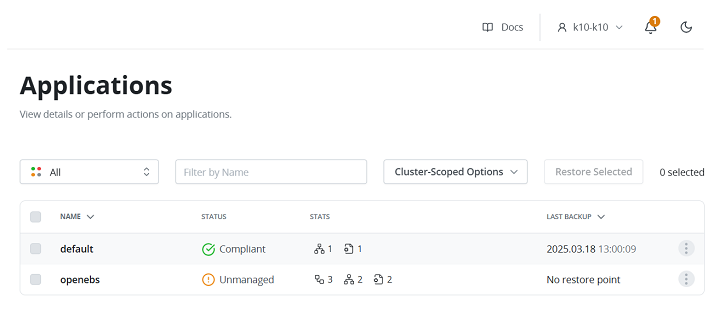
- Choose the latest available restore point from the list (e.g., 2025.03.18 13:00:09).
- Click Restore to initiate the process.
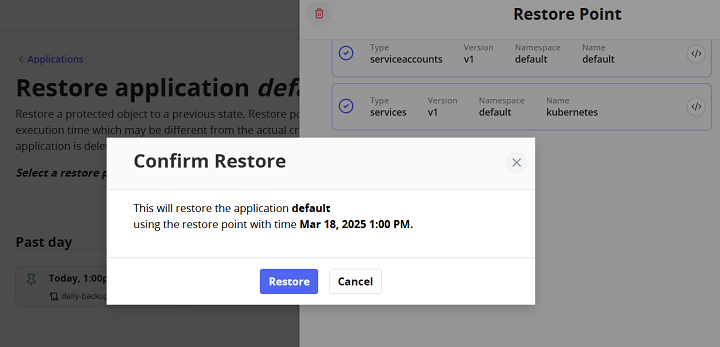
- Configure the restore options:
- Choose to restore the Entire Namespace (recommended for full recovery) or Specific Resources (such as Pods, ConfigMaps, or PVCs).
- Confirm the restore settings and proceed.
- Monitor the restoration process by navigating to the Restores tab in Kasten K10.
- Wait for the restore operation to complete.
Now, verify that the application is running properly by executing −
$ kubectl get pods -n default
Output
NAME       READY   STATUS    RESTARTS   AGE
test-pod   1/1     Running   0          2m2s
Conclusion
Tools like Velero and Kasten K10 simplify the backup and restoration process, enabling automated, scheduled backups and seamless disaster recovery. Whether leveraging MinIO as an S3-compatible backend for Velero or utilizing Kasten K10âs intuitive interface for policy-based backups, these solutions help Kubernetes administrators stay prepared for unexpected failures.
By implementing best practices such as regular testing, offsite storage, and monitoring, we can ensure that our Kubernetes clusters remain protected. In the face of accidental deletions, cyber threats, or infrastructure failures, a well-planned backup and recovery strategy can enable quick restoration and keep applications running smoothly.