- Kubernetes Tutorial
- Kubernetes - Home
- Kubernetes - Overview
- Kubernetes - Architecture
- Kubernetes - Setup
- Kubernetes - Setup on Ubuntu
- Kubernetes - Images
- Kubernetes - Jobs
- Kubernetes - Labels & Selectors
- Kubernetes - Namespace
- Kubernetes - Node
- Kubernetes - Service
- Kubernetes - POD
- Kubernetes - Replication Controller
- Kubernetes - Replica Sets
- Kubernetes - Deployments
- Kubernetes - Volumes
- Kubernetes - Secrets
- Kubernetes - Network Policy
- Advanced Kubernetes
- Kubernetes - API
- Kubernetes - Kubectl
- Kubernetes - Kubectl Commands
- Kubernetes - Creating an App
- Kubernetes - App Deployment
- Kubernetes - Autoscaling
- Kubernetes - Dashboard Setup
- Kubernetes - Helm Package Management
- Kubernetes - CI/CD Integration
- Kubernetes - Persistent Storage and PVCs
- Kubernetes - RBAC
- Kubernetes - Logging & Monitoring
- Kubernetes - Service Mesh with Istio
- Kubernetes - Backup and Disaster Recovery
- Managing ConfigMaps and Secrets
- Running Stateful Applications
- Kubernetes Useful Resources
- Kubernetes - Quick Guide
- Kubernetes - Useful Resources
- Kubernetes - Discussion
CI/CD Integration in Kubernetes
Continuous Integration and Continuous Deployment (CI/CD) play an important role in delivering applications efficiently. Kubernetes plays a crucial role in modern DevOps workflows by providing a scalable and automated platform for deploying applications. By integrating Kubernetes with CI/CD pipelines, we can achieve faster deployments, automated rollbacks, and seamless updates with minimal downtime.
In this chapter, we will explore how to integrate Kubernetes with CI/CD, covering the fundamental concepts, tools, and best practices that will help streamline our deployment processes.
Understanding CI/CD in Kubernetes
CI/CD stands for Continuous Integration and Continuous Deployment, a set of practices designed to automate the development, testing, and deployment of applications.
- Continuous Integration (CI) − Developers frequently push code changes to a shared repository. These changes are automatically built, tested, and validated to ensure they dont introduce errors.
- Continuous Deployment (CD) − Once a change passes CI, it is automatically deployed to a production or staging environment, reducing manual intervention and increasing release speed.
With Kubernetes, we automate application deployment, scaling, and operations, making it a perfect match for CI/CD.
Why Use Kubernetes for CI/CD?
Integrating CI/CD with Kubernetes provides several benefits −
- Scalability − Kubernetes ensures applications can handle traffic fluctuations by scaling dynamically.
- Rolling Updates and Rollbacks − Deploy new versions of applications with zero downtime and easily revert to previous versions if issues arise.
- Declarative Configuration − Kubernetes uses YAML manifests to define infrastructure as code, ensuring consistency across environments.
- Automation − Kubernetes operators and controllers help automate tasks like deployments, monitoring, and self-healing.
CI/CD Tools for Kubernetes
To implement CI/CD in Kubernetes, we will use the following tools −
- GitHub − A code repository where developers push changes.
- GitHub Actions − A CI/CD automation tool to build, test, and deploy applications.
- Containerd − Used to containerize applications before deploying to Kubernetes.
- ArgoCD − A GitOps-based continuous deployment tool.
Each of these tools plays a crucial role in automating our Kubernetes deployment pipeline.
Step 1: Setting Up a GitHub Repository
We will start by creating a GitHub repository to store our application code and CI/CD configurations.
Go to GitHub and sign in to your account. Click the + icon in the top right corner and select New repository. We will name the repository kubernetes-cicd and initialize it.
Once the repository is created, clone it locally using the following commands −
$ git clone https://github.com/your-username/kubernetes-cicd.git
$ cd kubernetes-cicd
Step 2: Setting Up GitHub Actions CI/CD Pipeline
Navigate to the cloned repository folder and create the required directories −
$ mkdir -p .github/workflows
Create the CI/CD Workflow File −
Using a text editor, create the following workflow file −
$ nano .github/workflows/ci-cd.yml
Then, add the following YAML content and save the file −
name: CI/CD Pipeline
on:
   push:
   branches:
      - main
jobs:
   build:
      runs-on: ubuntu-latest
   steps:
      - name: Checkout Code
         uses: actions/checkout@v3
      - name: Set up Docker
         uses: docker/setup-buildx-action@v2
      - name: Build Docker Image
         run: |
            docker build -t myapp:latest .
      - name: Push to Docker Hub
         run: |
            echo "${{ secrets.DOCKER_PASSWORD }}" | docker login -u "${{ secrets.DOCKER_USERNAME }}" --password-stdin
            docker tag myapp:latest myrepo/myapp:latest
            docker push myrepo/myapp:latest
Step 3: Committing and Pushing Changes
After setting up the repository and adding the necessary files, well need to commit and push them to GitHub.
Stage all Changes
$ git add -A
This command stages all changes in the repository, including new, modified, and deleted files.
Commit the changes
$ git commit -m "Added GitHub Actions CI/CD workflow and removed README.md"
Output
[main cddfa2c] Added GitHub Actions CI/CD workflow and removed README.md
 1 file changed, 1 deletion(-)
 delete mode 100644 README.md
The commit message confirms that a new commit has been created in the local repository, recording the addition of the CI/CD workflow and the removal of README.md.
Push the Changes to GitHub
$ git push origin main
Output
Username for 'https://github.com': asigoondara
Password for 'https://asigoondara@github.com':
Enumerating objects: 9, done.
Counting objects: 100% (9/9), done.
Delta compression using up to 4 threads
Compressing objects: 100% (5/5), done.
Writing objects: 100% (9/9), 967 bytes | 967.00 KiB/s, done.
Total 9 (delta 1), reused 0 (delta 0), pack-reused 0
remote: Resolving deltas: 100% (1/1), done.
To https://github.com/asigoondara/kubernetes-cicd.git
 * [new branch]      main -> main
Explanation −
GitHub prompts for credentials to authenticate the push.
The repository now contains the latest changes, including the CI/CD workflow.
The message new branch main -> main confirms that our branch has been successfully updated in the remote repository.
Step 4: Deploying to Kubernetes Using ArgoCD
Now that our code is in GitHub, we will deploy our application using ArgoCD, a GitOps-based deployment tool.
Install ArgoCD
$ kubectl create namespace argocd
$ kubectl apply -n argocd -f https://raw.githubusercontent.com/argoproj/argo-cd/stable/manifests/install.yaml
Output
customresourcedefinition.apiextensions.k8s.io/applications.argoproj.io created
customresourcedefinition.apiextensions.k8s.io/applicationsets.argoproj.io created
customresourcedefinition.apiextensions.k8s.io/appprojects.argoproj.io created
serviceaccount/argocd-application-controller created
serviceaccount/argocd-applicationset-controller created
serviceaccount/argocd-dex-server created
serviceaccount/argocd-notifications-controller created
serviceaccount/argocd-redis created
serviceaccount/argocd-repo-server created
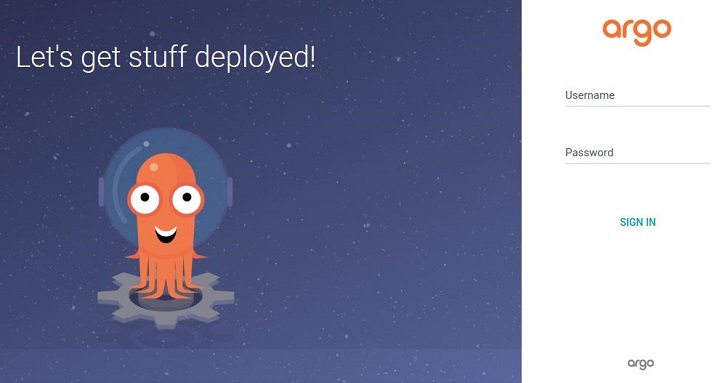
Access the ArgoCD UI
$ kubectl port-forward svc/argocd-server -n argocd 8080:443
Output
Forwarding from 127.0.0.1:8080 -> 8080
Forwarding from [::1]:8080 -> 8080
This output confirms that port forwarding has been successfully established, allowing us to access the ArgoCD UI via https://localhost:8080.
Retrieve ArgoCD Admin Password
$ kubectl -n argocd get secret argocd-initial-admin-secret -o jsonpath="{.data.password}" | base64 -d
Output
fUBg7s8lv30EtBjq
This command extracts and decodes the ArgoCD admin password from Kubernetes secrets, allowing us to log in.
Log in to ArgoCD via CLI
$ sudo argocd login localhost:8080 --insecure
Output
Username: admin
Password:
'admin:login' logged in successfully
Context 'localhost:8080' updated
Explanation −
We logged in to the ArgoCD CLI using the credentials retrieved earlier.
The --insecure flag is used to bypass certificate validation for localhost connections.
The message Context 'localhost:8080' updated confirms that the login was successful.
Applying the ArgoCD Application YAML File
Before applying the ArgoCD application YAML file, we need to create and save it as a .yaml file in our local machine. To achieve this, well create a file named myapp.yaml and then apply it using kubectl.
Create and Open the YAML File −
Create the file using a text editor such as nano −
$ nano myapp.yaml
Then, paste the following content into the file −
apiVersion: argoproj.io/v1alpha1
kind: Application
metadata:
   name: myapp
   namespace: argocd
spec:
   project: default
   destination:
      namespace: default
      server: https://kubernetes.default.svc
   source:
      repoURL: https://github.com/myrepo/myapp.git
      targetRevision: main
      path: k8s
   syncPolicy:
      automated:
         prune: true
         selfHeal: true
Once the file is saved, apply it using −
$ kubectl apply -f myapp.yaml --validate=false
This command tells Kubernetes to create the application in ArgoCD based on the specified configuration.
Output
application.argoproj.io/myapp created
Finally, well sync the application using −
$ argocd app sync myapp
Output
TIMESTAMP  NAME    STATUS      MESSAGE
---------- ------- ----------- -----------------------------------
15:30:45   myapp   Synced      Successfully synced (all tasks run)
15:30:45   myapp   Healthy     Application is healthy
This output confirms our application has been successfully synchronized and that the current state matches the desired state defined in our repository.
Conclusion
Integrating Kubernetes with CI/CD streamlines the deployment process, improves reliability, and reduces manual intervention. By leveraging tools like GitHub Actions, Containerd, and ArgoCD, we can automate building, testing, and deploying applications efficiently.
With the right practices in place, we can ensure our applications are always up-to-date, resilient, and ready to scale. Now, you can take this knowledge and start implementing a CI/CD pipeline in your Kubernetes environment.